Use Trust Flags
Alation Cloud Service Applies to Alation Cloud Service instances of Alation
Customer Managed Applies to customer-managed instances of Alation
Important
You are viewing documentation for Alation’s Classic User Experience.
Overview
Alation uses trust flags to help you understand the quality and reliability of your data. The three trust flags are:
Endorsement: Shows that users trust an object and recommend it for use.
Important Info: Alerts users to potential issues with an object. (Called Warning in the Classic User Experience.)
Warning: Alerts users to potential issues with an object. (Called Important Info in the New User Experience.)
Deprecation: Signals that you shouldn’t use an object.
Object Type Support
The following table shows which object types can have trust flags.
Object Categories |
Object Types |
|---|---|
API resource objects |
API resource folders, API resources, API resource fields |
BI objects |
BI servers, BI reports, BI datasources, BI folders, BI datasource columns, BI report columns |
Documentation objects (2025.1.1 and later) |
Documents, folders |
File system objects |
File systems, files, file attributes |
RDBMS objects |
Data sources, schemas, tables, columns NoSQL databases, NoSQL collections, NoSQL attributes Filters, functions, joins, queries |
Other objects |
Catalog sets, dataflows |
Endorsements
Endorsements show that users trust an object and recommend it for use.
View Details of an Endorsement
To view details of an Endorsement:
Open the catalog page for the object.
Click the green Endorsement icon next to the object’s title. The Trust Flags dialog opens.
The Endorsements box shows the Endorsement details, including the user who endorsed it and the date it was added.
Click the Close button to close the dialog.
Open the catalog page for the object.
Click the green Endorsement pill.
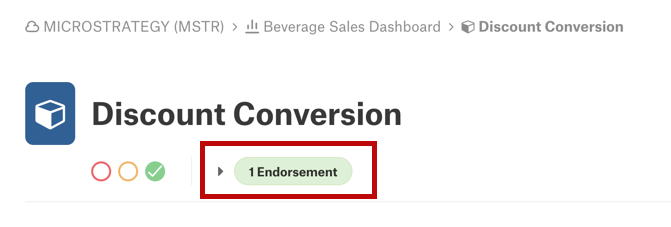
The Endorsed by box opens, showing the Endorsement details, including the user who endorsed it and the date it was added.
Endorse an Object
If an object is deprecated, you can’t endorse it, and the green check mark for existing Endorsements won’t appear.
To endorse an object:
Open the catalog page for the object.
Click the three-dots icon in the top right corner of the page.
Select Endorse from the menu.
Note
If an object is deprecated, you can’t endorse it.
Open the catalog page for the object.
Click the green circle next to the object’s name.
Remove an Endorsement
You can remove your own Endorsement of an object, and users with the Server Admin role can remove other user’s Endorsements.
To remove an Endorsement from an object:
Open the catalog page for the object.
Click the green Endorsement icon next to the object’s title. The Trust Flags dialog opens.
Click the Delete Endorsement button. The Endorsement will be removed immediately.
Open the catalog page for the object.
Click the green Endorsement pill.
Hover over the Endorsement box and click the X icon.
Click the Remove Endorsement button to confirm.
Important Info and Warnings
These flags alert users to potential issues with an object. They’re called Important Info in the New User Experience and Warning in the Classic User Experience.
View Details of Important Info or Warnings
To view details of Important Info:
Open the catalog page for the object.
Click the blue Important Info icon next to the object’s title.
The Important Info dialog shows the details, including the user who added it, the date it was added, and the message.
Click the Close button to close the dialog.
To view details of a Warning:
Open the catalog page for the object.
Click the yellow Warning pill.
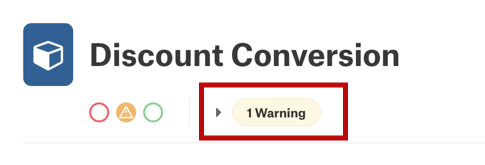
The Warning box shows the details, including the user who added it, the date it was added, and the message.
Add Important Info or Warning to an Object
To add Important Info to an object:
Open the catalog page for the object.
Click the three-dots icon in the top right corner of the page.
Select Add Important Info from the menu and add an explanation.
Click the Add button.
Alation notifies users who have referenced the object in a query.
To add a Warning to an object:
Open the catalog page for the object.
Click the yellow circle next to the object’s name.
Add an explanation for the Warning.
Click the Warn button.
Alation notifies users who have referenced the object in a query.
Edit an Important Info Message
To edit an Important Info message, you must be the one who added the Important Info. A Server Admin can remove the Important Info and then another Important Info with a new message.
To edit the Important Info message for an object:
Open the catalog page for the object.
Click the three-dots icon in the top right corner of the page.
Select Edit Important Info from the menu.
Edit the message as needed.
Click the Update button.
You can’t edit the warning message for an object in the Classic User Experience. Instead, you can remove the Warning and then add a new Warning with a new message.
Remove an Important Info or Warning
To remove an Important Info or Warning from an object, you must be the one who added the Important Info or Warning or you must have the Server Admin role.
In the Classic User Experience, you can’t remove a propagated Warning directly. Instead, you have to remove the Deprecation from the object that created the propagated Warning. In the New User Experience, you can remove any Important Info, including propagated ones.
To remove an Important Info from an object:
Open the catalog page for the object.
Click the blue Important Info icon next to the object’s title. The Important Info dialog opens.
Click the Delete Important Info button. The Important Info will be removed immediately.
To remove a Warning from an object:
Open the catalog page for the object.
Click the yellow Warning pill.
Hover over the Warning box and click the X icon.
Click the Remove Warning button to confirm.
Deprecations
Deprecations signal that you shouldn’t use an object. Deprecating an object won’t remove it from the catalog, but will mark it as deprecated and alert users to avoid using it in queries.
View Details of a Deprecation
To view details of a Deprecation:
Open the catalog page for the object.
Click the red Deprecation icon next to the object’s title.
The Trust Flags dialog shows the details, including the user who added it, the date it was added, and the message.
Click the Close button to close the dialog.
Open the catalog page for the object.
Click the red Deprecation pill.
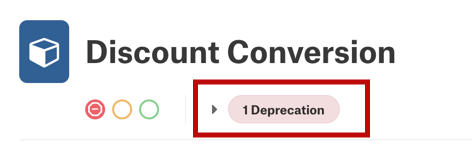
The Deprecation box shows the details, including the user who added it, the date it was added, and the message.
Deprecate an Object
To deprecate an object:
Open the catalog page for the object.
Click the three-dots icon in the top right corner of the page.
Select Deprecate from the menu and add a note explaining why.
Click the Deprecate button.
Alation notifies users who have referenced the object in a query.
Open the catalog page for the object.
Click the red circle next to the object’s name.
Add a note explaining why you’re deprecating the object.
Alation notifies users who have referenced the object in a query.
Edit a Deprecation Message
To edit a Deprecation message, you must be the one who added the Deprecation. A Server Admin can remove the Deprecation and then re-deprecate the object with a new message.
To edit the Deprecation message for an object:
Open the catalog page for the object.
Click the three-dots icon in the top right corner of the page.
Select Edit Deprecation from the menu.
Edit the deprecation message as needed.
Click the Update button.
You can’t edit the deprecation message for an object in the Classic User Experience. Instead, you can remove the Deprecation and then re-deprecate the object with a new message.
Remove a Deprecation
To remove a Deprecation from an object, you must be the one who added the Deprecation or have the Server Admin role.
In the Classic User Experience, you can’t remove a propagated Deprecation. Instead, you have to remove the original Deprecation from the object that created the propagated Deprecation. In the New User Experience, you can remove any Deprecation, including propagated ones.
To remove a Deprecation from an object:
Open the catalog page for the object.
Click the red Deprecation icon next to the object’s title. The Trust Flags dialog opens.
Click the Delete Deprecation button. The Deprecation will be removed immediately.
Open the catalog page for the object.
Click the red Deprecation pill.
Hover over the Deprecation box and click the X icon.
Click the Remove Deprecation button to confirm.
Deprecation Propagation
When you add a Deprecation to certain object types, Alation can propagate the Deprecation to the object’s children and related objects:
Hierarchy Propagation: The propagated Deprecation message will say “Deprecation propagated from <source of deprecation>.”
Deprecating a data source, schema, or table object will also deprecate all its descendants.
Deprecating a data source, schema, or table object will also deprecate all queries, filters, and joins that use the object.
Deprecating a BI object will also deprecate all its child BI objects.
Deprecating a folder will also deprecate all its child folders and documents, including sub-documents (2025.1.1 and later).
Lineage Propagation: Tables and BI objects that are connected to a deprecated object (or its children) by lineage get an Important Info flag: “Warning propagated from the deprecation of <source of deprecation>.”
Lineage Propagation: Tables and BI objects that are connected to a deprecated object (or its children) by lineage get a Warning flag: “Warning propagated from the deprecation of <source of deprecation>.”
Removing deprecation from the parent object removes the propagated flags from children and related objects.
How Propagation Works
When a Deprecation propagates to related objects, the flag is copied, but doesn’t retain any connection to the original object. If you move a child object, it keeps the propagated Deprecation. New child objects added after propagation don’t get the Deprecation flag.
Propagation happens in the background and may take a little time to finish. The length of time depends on various factors, such as the size of your instance and how many background tasks are already running.
You can deprecate a child object that already has a propagated Deprecation. The object will show both Deprecations.
Field-Level Permissions
Trust flags can have field-level permissions to restrict editing to certain users. See Add Permissions to a Custom Field for help setting field-level permissions. Trust flag fields are labeled as <Object Type> Flags in the Custom Field Permissions tab of the Admin Settings page.
The following table shows which object types can have field-level permissions set for trust flags.
Object Categories |
Object Types |
|---|---|
API resource objects |
API resource folders, API resources, API resource fields |
BI objects |
BI servers, BI reports, BI datasources, BI folders, BI datasource columns, BI report columns |
File system objects |
File systems, files |
RDBMS objects |
Data sources, schemas, tables, columns NoSQL databases, NoSQL collections, NoSQL attributes |
Other objects |
Dataflows |
Trust flags for documents and folders don’t have field-level permissions. The Document Hubs permissions feature controls the ability to view and edit trust flags for documents and folders. If you have access to view or edit a document or folder, you have access to view or edit its trust flags. Trust flags are available for documents and folders starting with release 2025.1.1.
Workflows and Trust Flags
Changes to trust flags aren’t governed by workflows. You can add, edit, or delete a trust flag even if the object is under a workflow.
To prevent users from changing trust flags, you can restrict editing permissions on the trust flags field. See Field-Level Permissions above for which object types can restrict permissions on trust flags. See Add Permissions to a Custom Field for help setting permissions on trust flags.