Configure Connection to the Atlas Data Source
Alation Cloud Service Applies to Alation Cloud Service instances of Alation
Customer Managed Applies to customer-managed instances of Alation
Configure New Atlas Data Source
Add a new Atlas data source in Alation: - Log in to Alation as a Server Admin. - Expand the Apps menu on the right of the main toolbar and select Sources. - On the Sources page, click +Add (top right) and select Data Source. - In the Add a Datasource screen, select Database Type as Atlas OCF Connector.
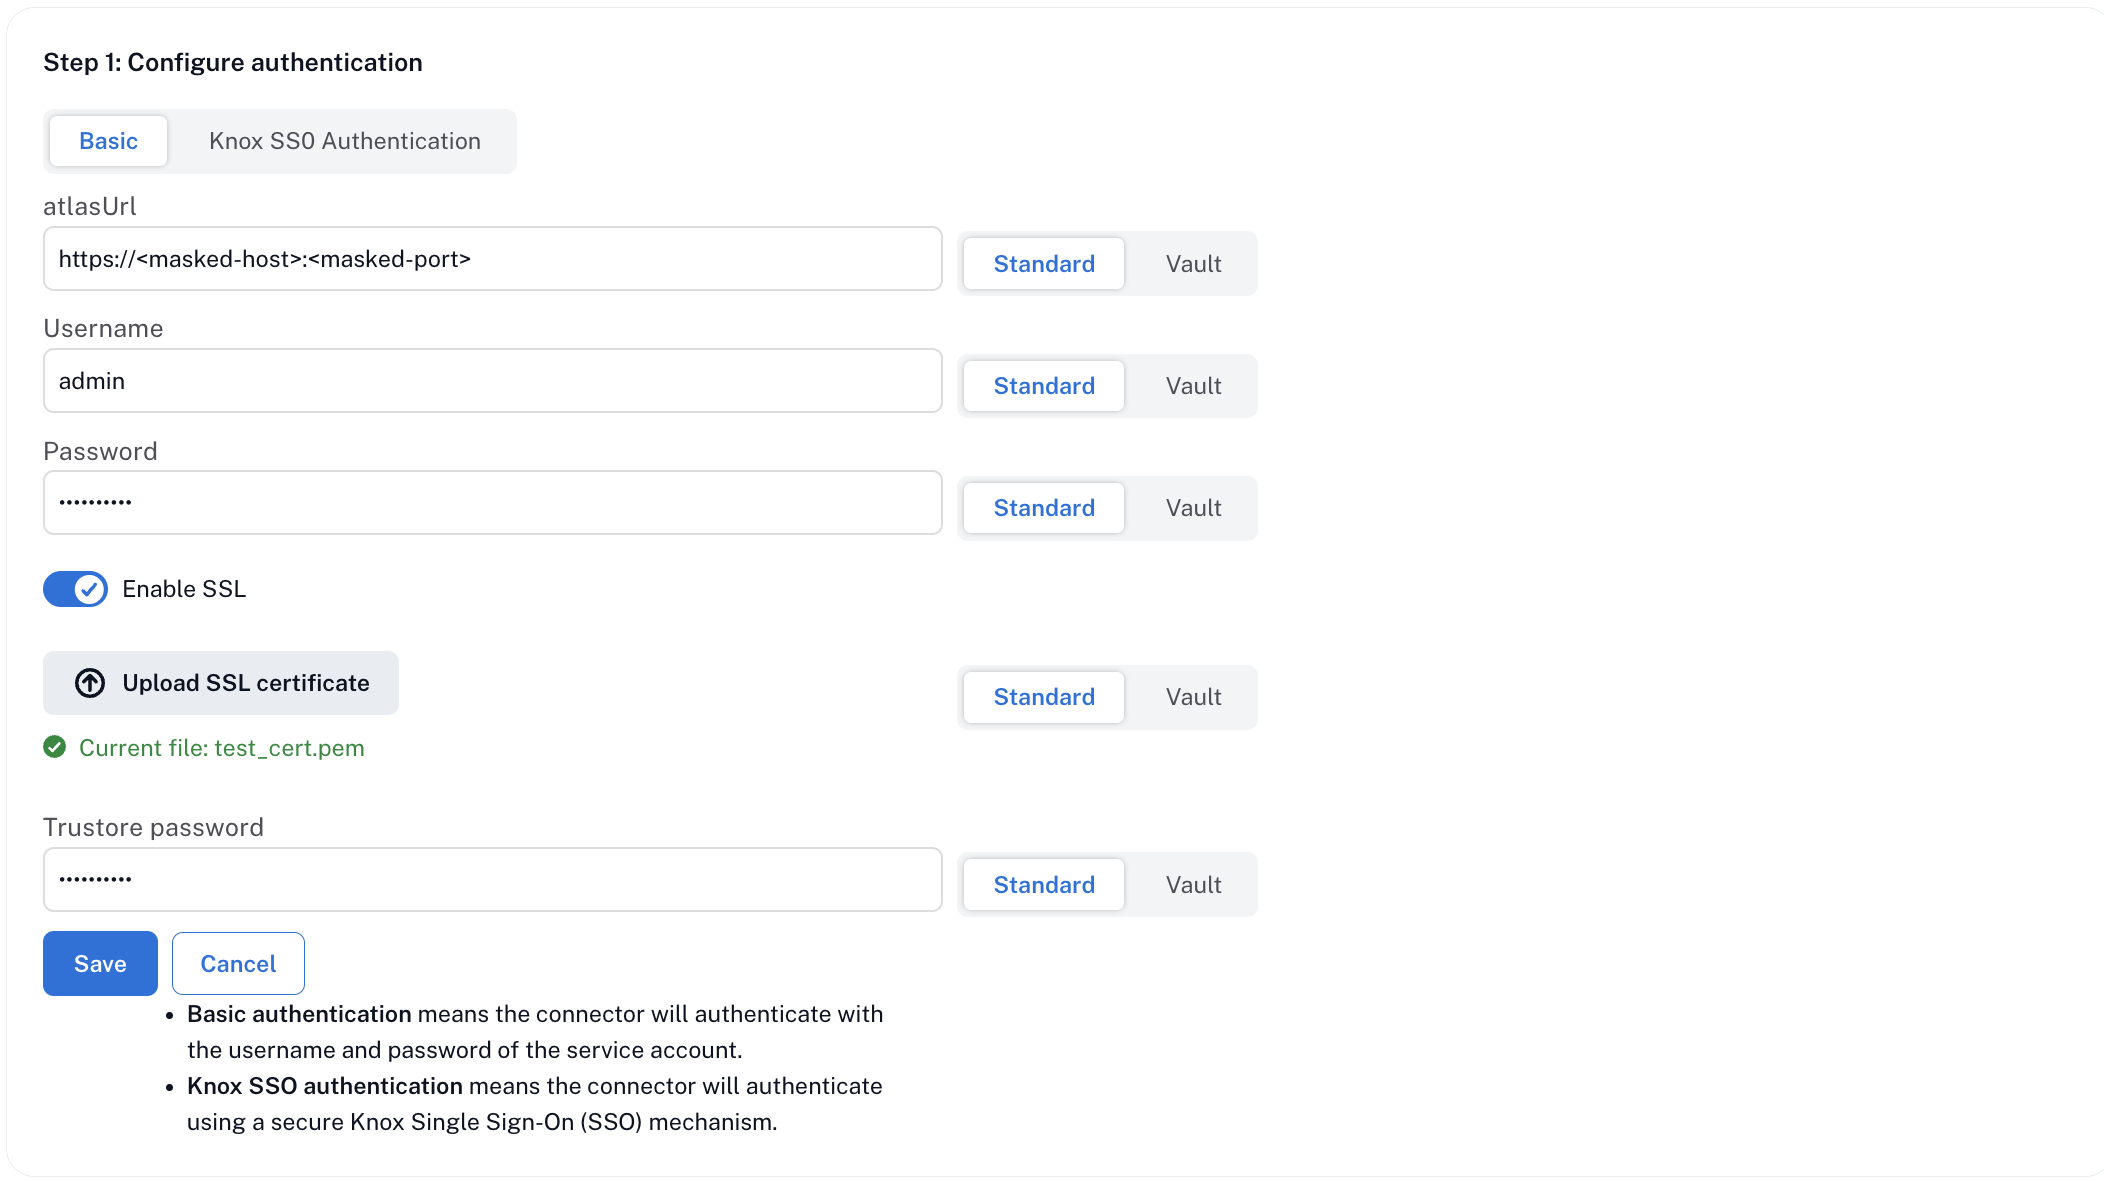
General Settings: - Populate the required fields in the General Settings tab.
If Atlas needs to be connected through Knox, select Knox SSO Authentication:
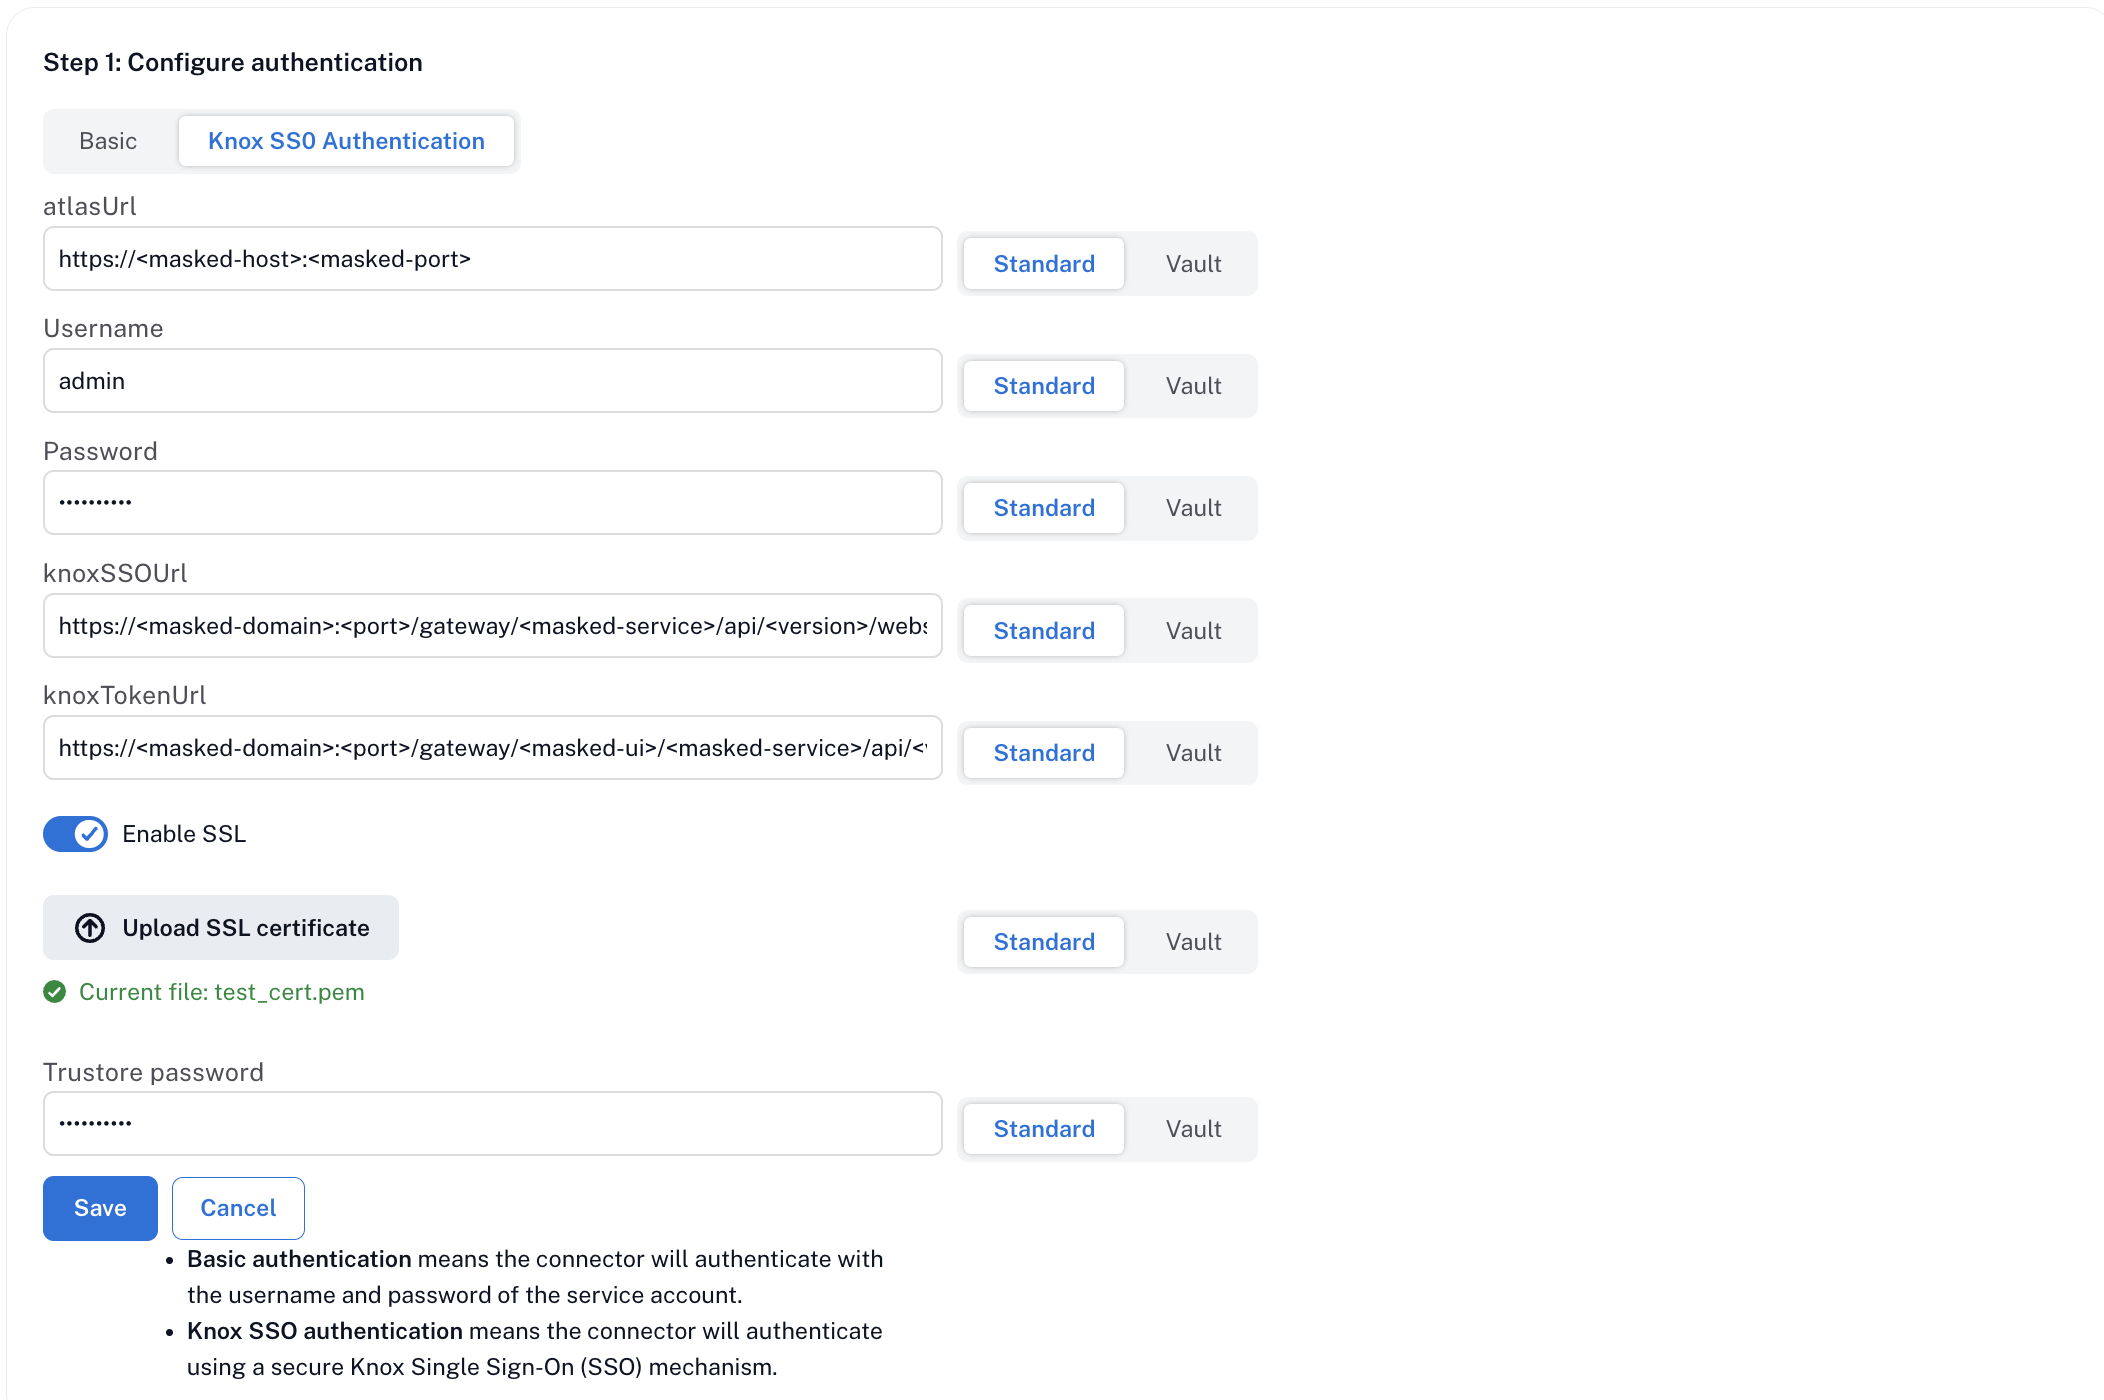
KNOX SSO URL: Provide the redirection URL for the required topology. Example:
`
https://<knox_url>/gateway/knoxsso/api/v1/websso?originalUrl=https://<knox_url>/gateway/homepage/home/
`
KNOX TOKEN URL: URL to create the Knox token for the topology. Example:
`
https://<knox_url>/gateway/homepage/knoxtoken/api/v2/token
`
ATLAS URL: Base URL for accessing Apache Atlas through Knox. Example:
`
https://<knox_url>/gateway/cdp-proxy-token/atlas/
`
Note: The above example is for API access in a Cloudera cluster. The topology for UI access may differ. Refer to your Knox configuration.Username and Password: - For Knox config: Provide Knox username and password for generating the token. - For non-Knox config: Provide Atlas username and password.
SSL Certificate: For self-signed CA/certificates, upload the certificate as described in prerequisites.
Truststore Password: The certificate is stored in a JKS file protected by this password. You may use any password.
Parameter Reference Table:
Parameter |
Description |
|---|---|
Atlas URL |
Enter the URL to access Atlas. |
Username |
Enter the service account username for Atlas or Knox. |
Password |
Enter the service account password for Atlas or Knox. |
Use SSL |
Select if Atlas requires SSL. |
SSL Certificate |
Upload the SSL certificate if SSL is enabled. |
Truststore Password |
Password to protect the truststore (JKS) for the SSL certificate. |
Knox SSO URL |
(If using Knox) Enter the Knox SSO URL for authentication. |
Knox Token URL |
(If using Knox) Enter the Knox Token URL for token generation. |
Click Save to save all configuration.
Under Test Connection, click Test to validate network connectivity.
