Manual Catalog Sets
Alation Cloud Service Applies to Alation Cloud Service instances of Alation
Customer Managed Applies to customer-managed instances of Alation
Important
You are viewing documentation for Alation’s Classic User Experience.
Manual catalog sets provide a way to group similar objects by hand, giving you direct control over the composition of the set. Manual sets can be useful when you want to manage equivalent objects without the constraints of automatic rules. For example, if you are dealing with multiple similar or duplicated data sources, using manual sets allows you to uniformly and concurrently manage catalog field values for the objects in the set and any related child objects.
To create and manage catalog sets, including bulk-editing field values for their members, you must have either Catalog Admin role or Server Admin role.
In this topic:
Create a Manual Catalog Set
To create a manual catalog set:
Open the Catalog Sets page.
On the top right of the Catalog Sets page, click the Add icon.
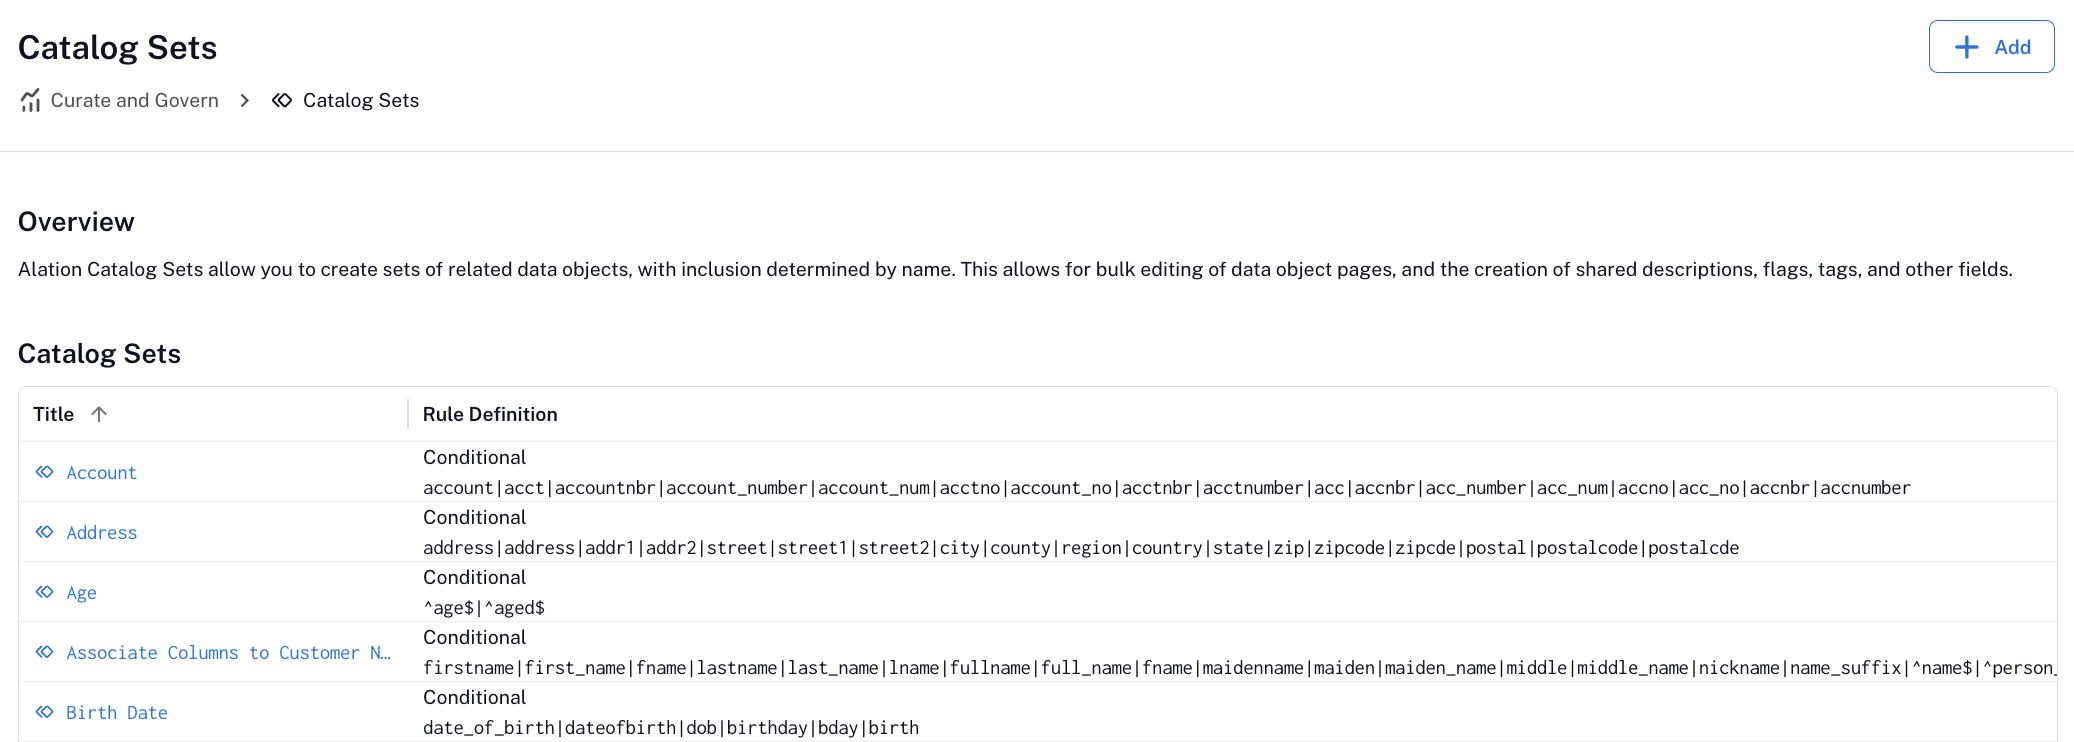
The New Catalog Set dialog opens. Select the Manual type.
Under Member Data Object Type, select the type of data objects that you want to unite in this set. You can select:
Data Source/Catalog
Schema
Table
Column
Click Create. The new manual catalog set page opens on the Overview & Rules tab.
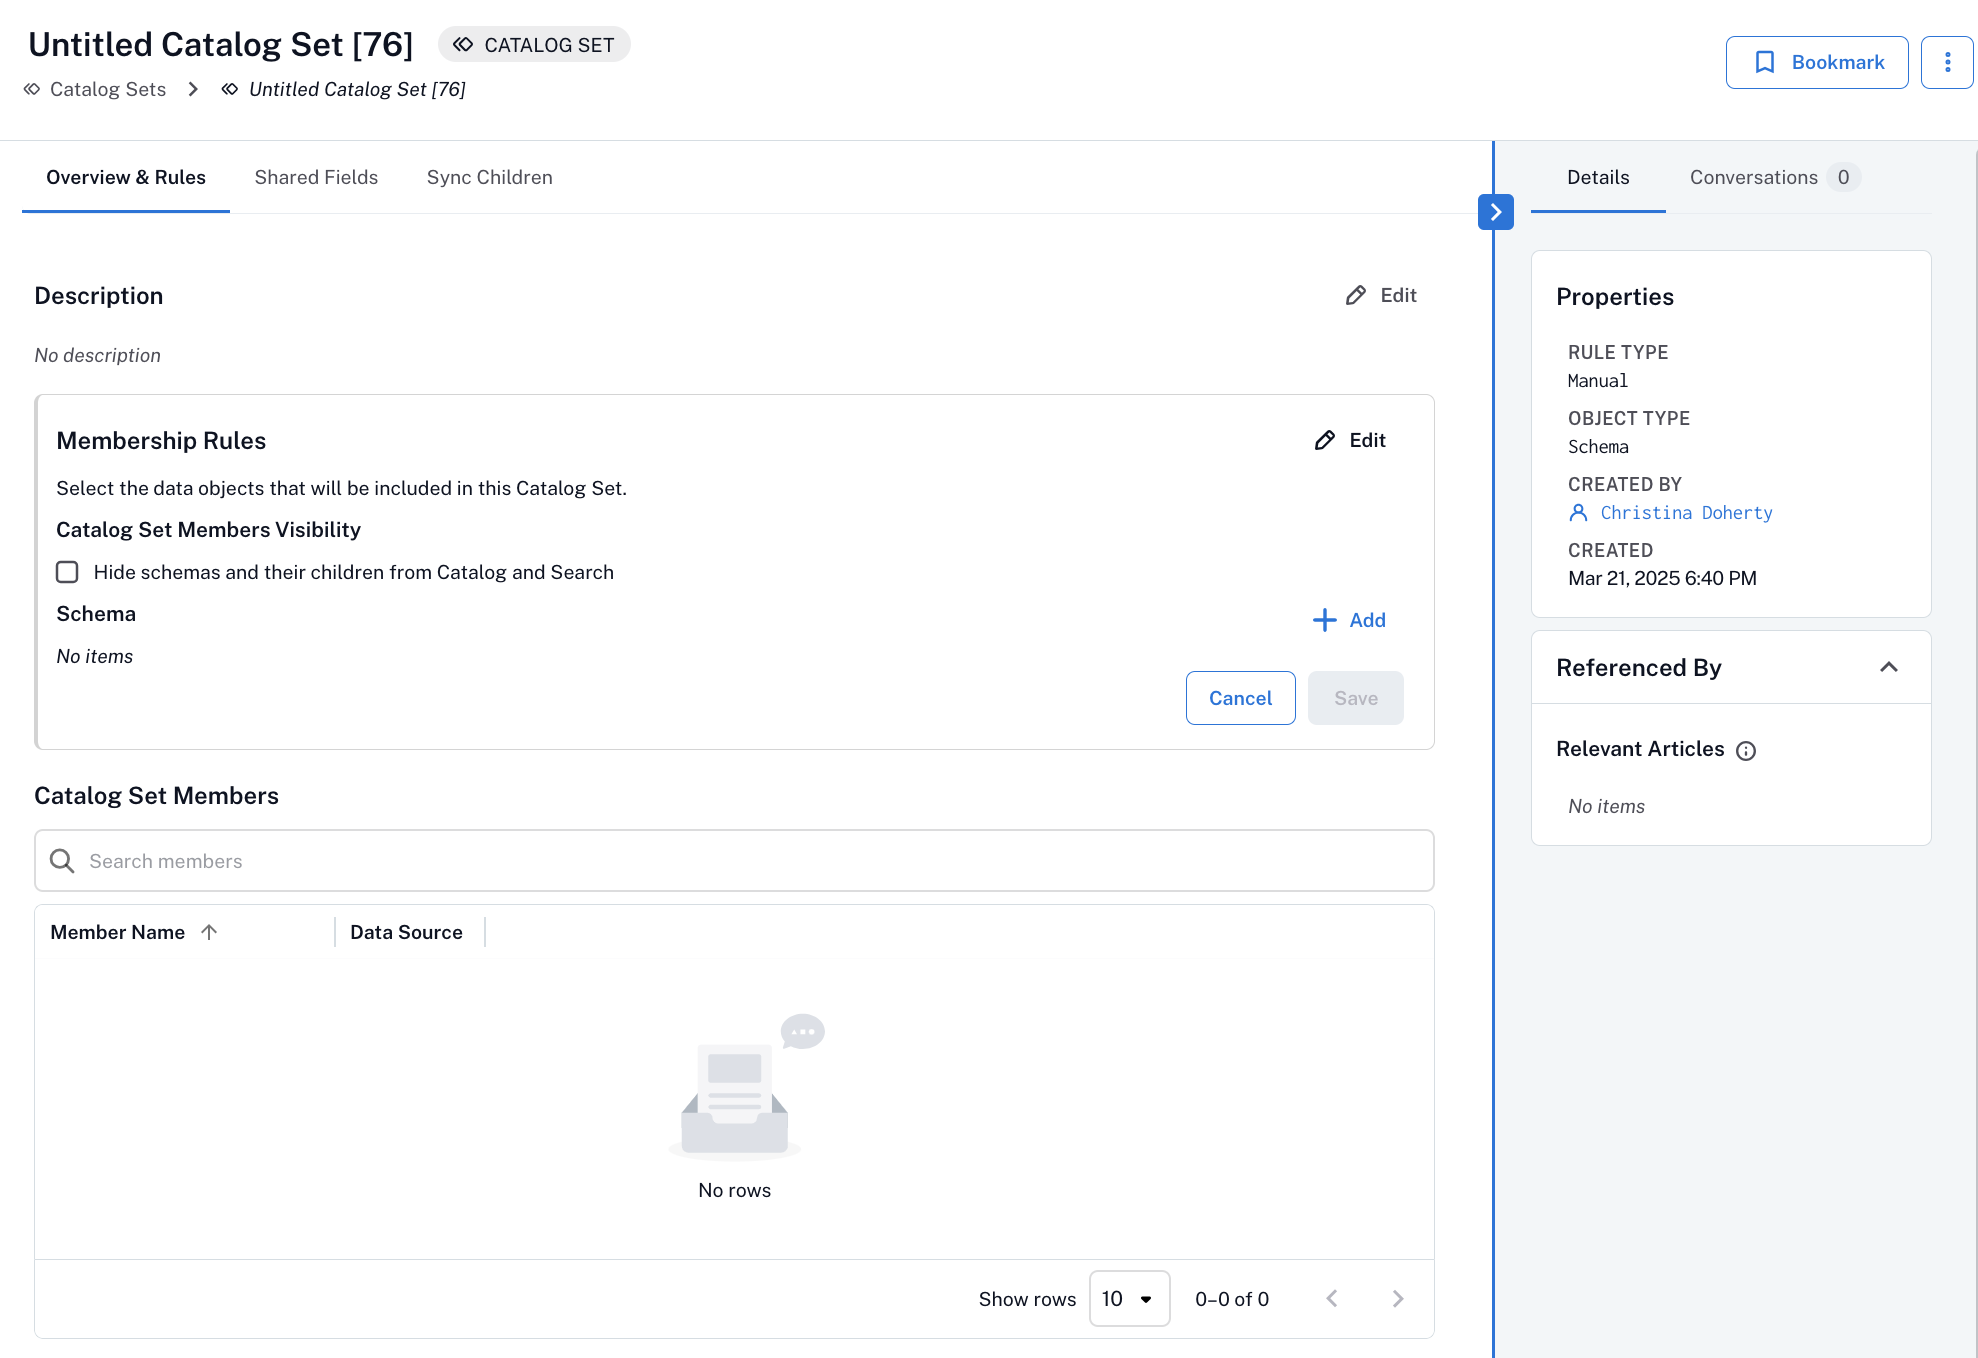
New catalog sets are initially untitled and appear as Untitled Catalog Set [Number]. Click the title to edit it and enter a meaningful name. Click outside the field to apply your changes.
Click the Edit button for the Description field, enter a description, and click Save.
Click the Edit button for Membership Rules. The Membership Rules pane expands. Membership rules define how objects of the selected type (datasource/catalog, schema, table, or column) are identified and grouped into the set. The member data object type (schema, table, or column) cannot be changed after creation.

If you have selected Data Source/Catalog, be aware that data sources that contain catalogs (like Presto) or databases (like SQL Server) cannot be synchronized with those that don’t. A catalog—but not its data source parent—must be directly added to the catalog set in order to synchronize its children (schemas, tables, columns) with the children of data sources that don’t contain catalogs or databases. In this case, the manual set of members would need to include a combination of data source objects and database catalog objects.
If you have selected Schema, you have the capability to use catalog sets to control the visibility of objects by hiding schemas and their child objects from the catalog. Select the Hide schemas and their children from Catalog and Search checkbox to make the schemas and their child objects undiscoverable by catalog users when they browse and search. Leave this checkbox clear to keep the catalog members visible.
Select the objects you want to include in the set:
Click Add to open the quick search for the selected object type.
Search for and select the specific objects you want to add.
Repeat this process for each additional object you want to include.
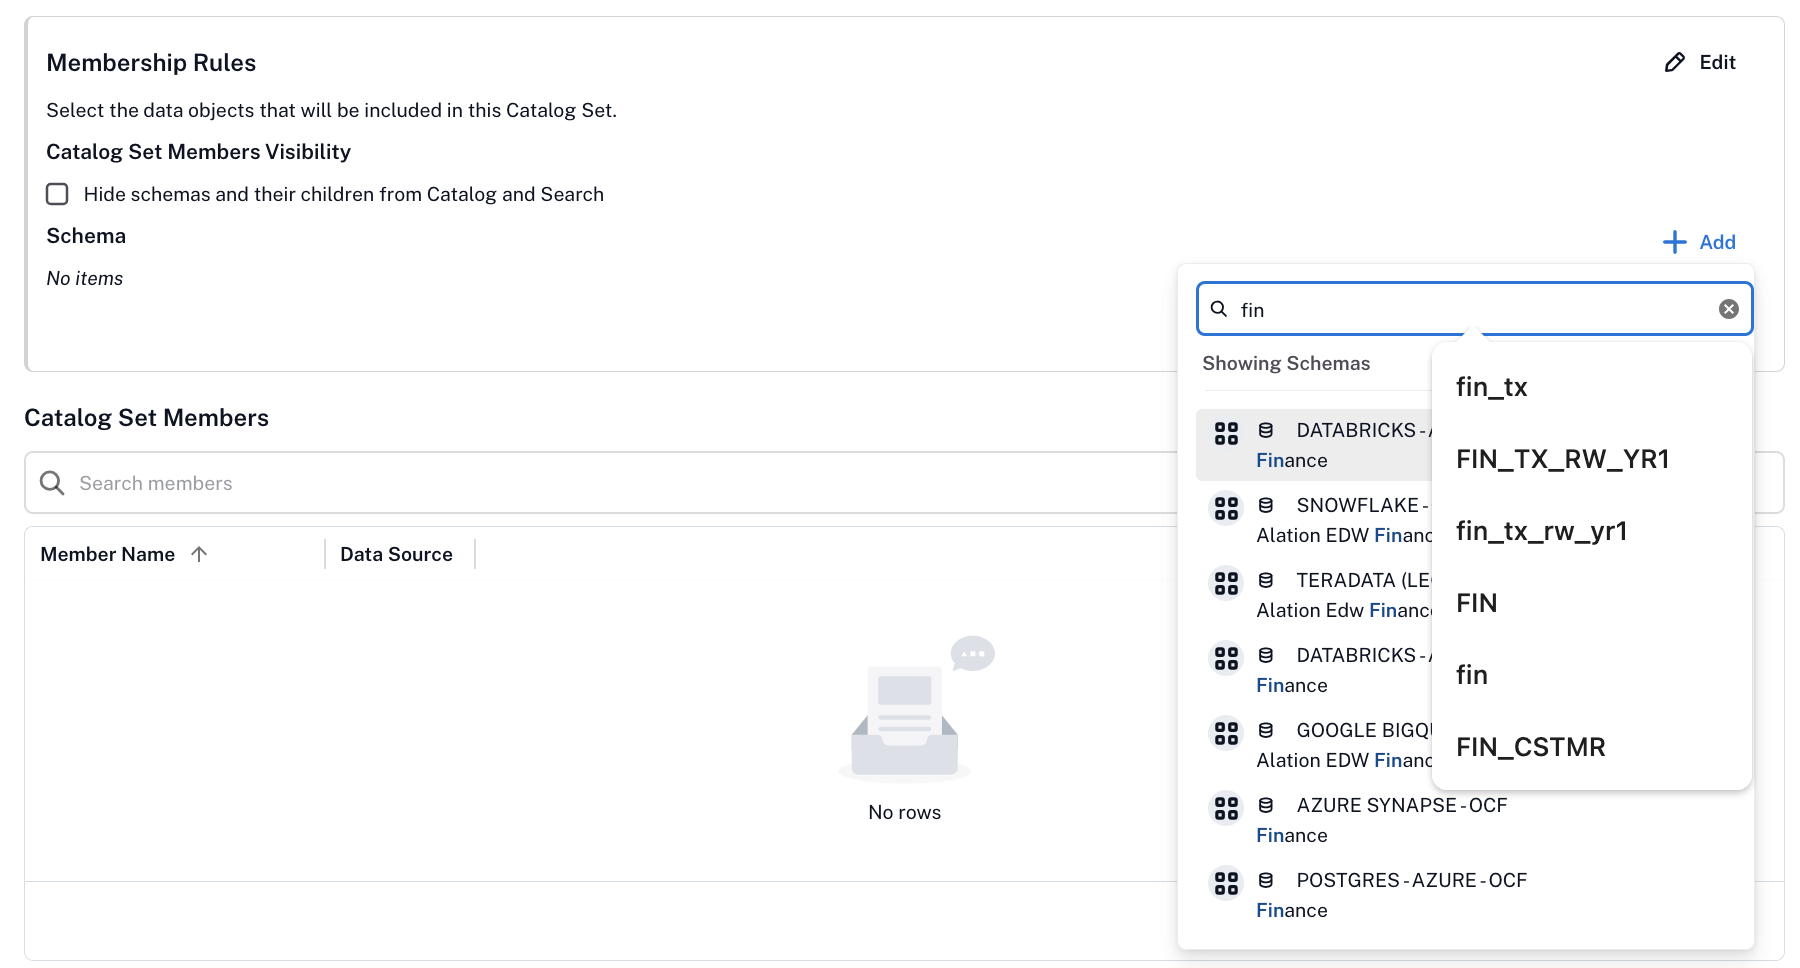
Click Save to create the set. The objects you selected appear under the Catalog Set Members table on the set’s page.
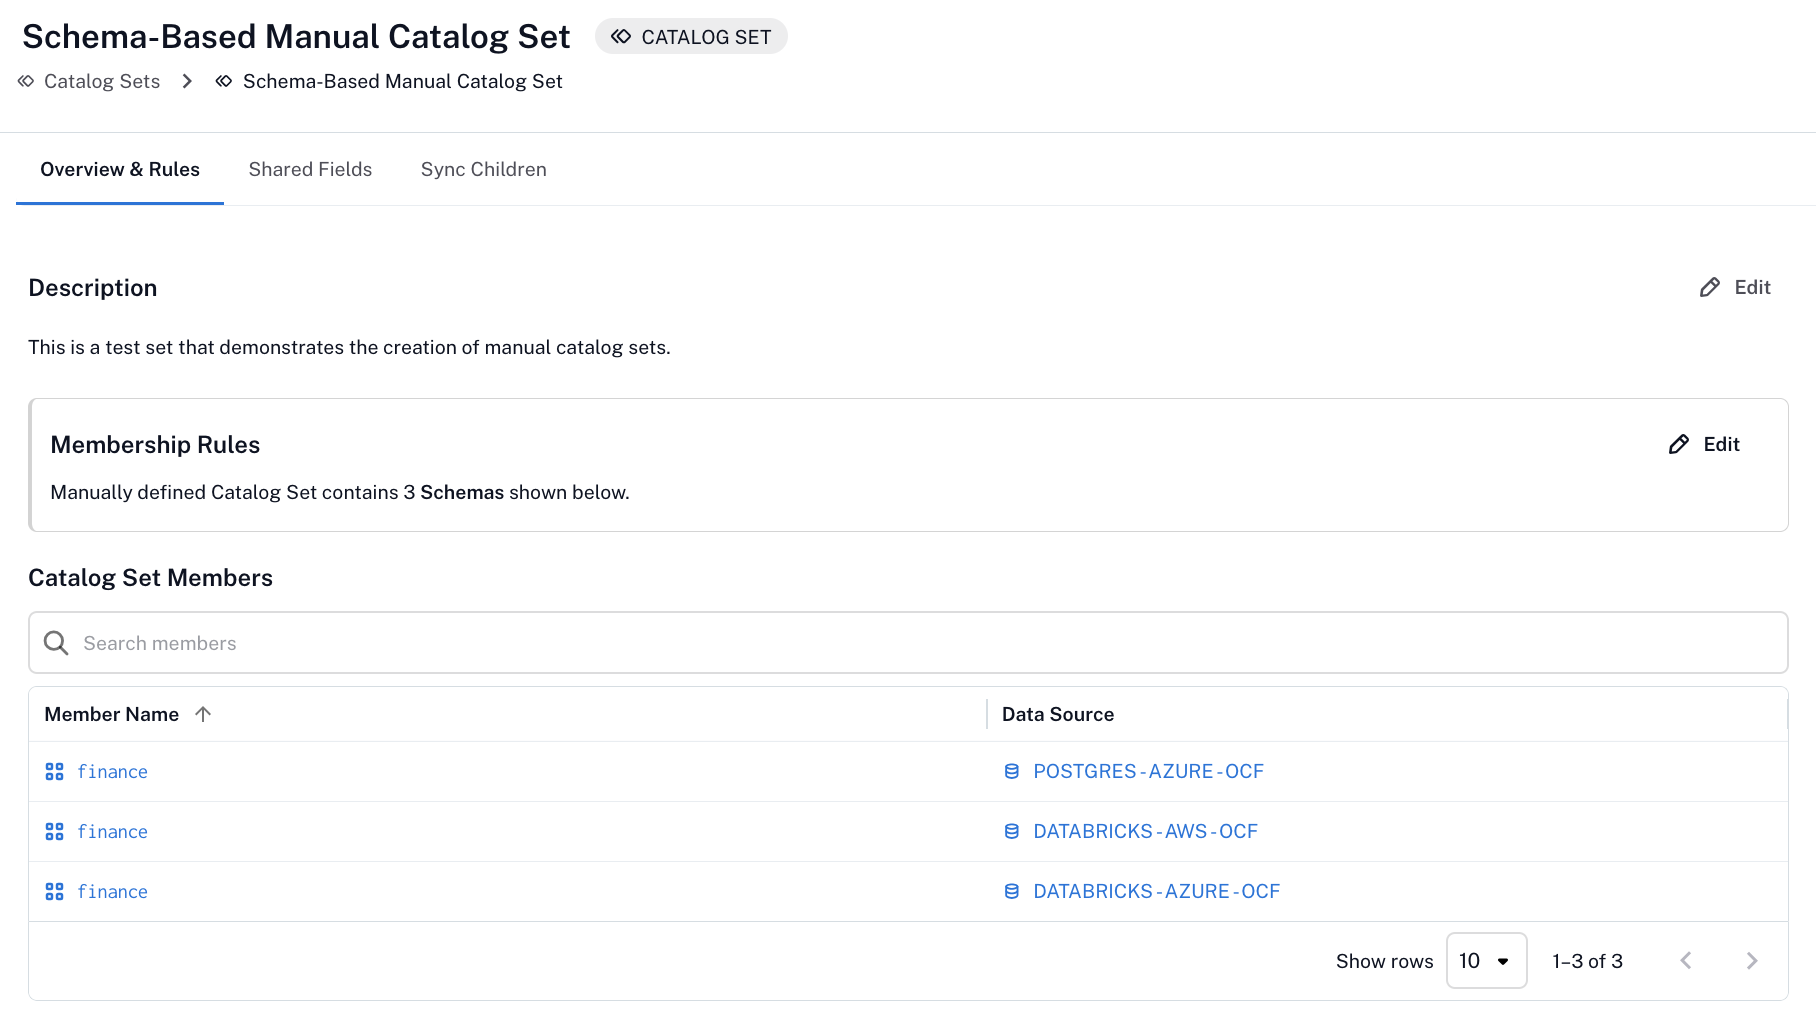
On the top right of the Catalog Sets page, click the Add icon.
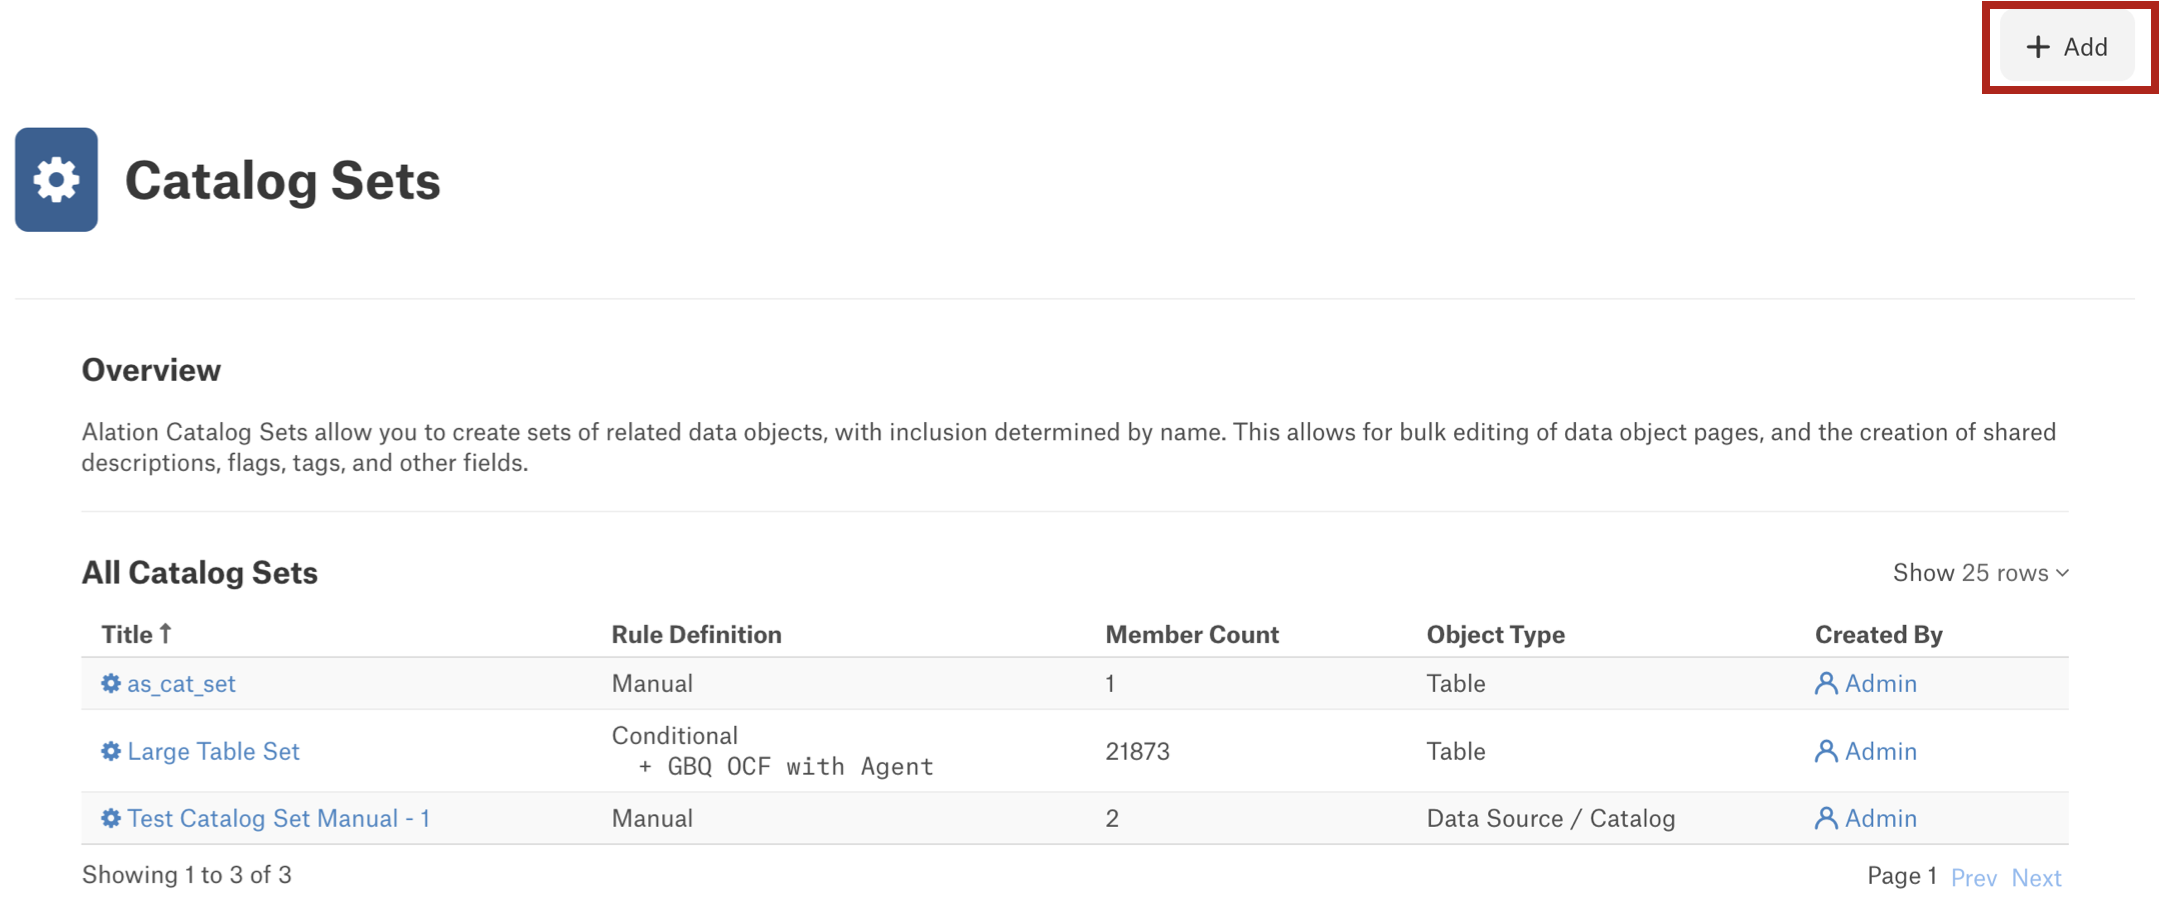
A new catalog set editor opens. Select the Manual tab.
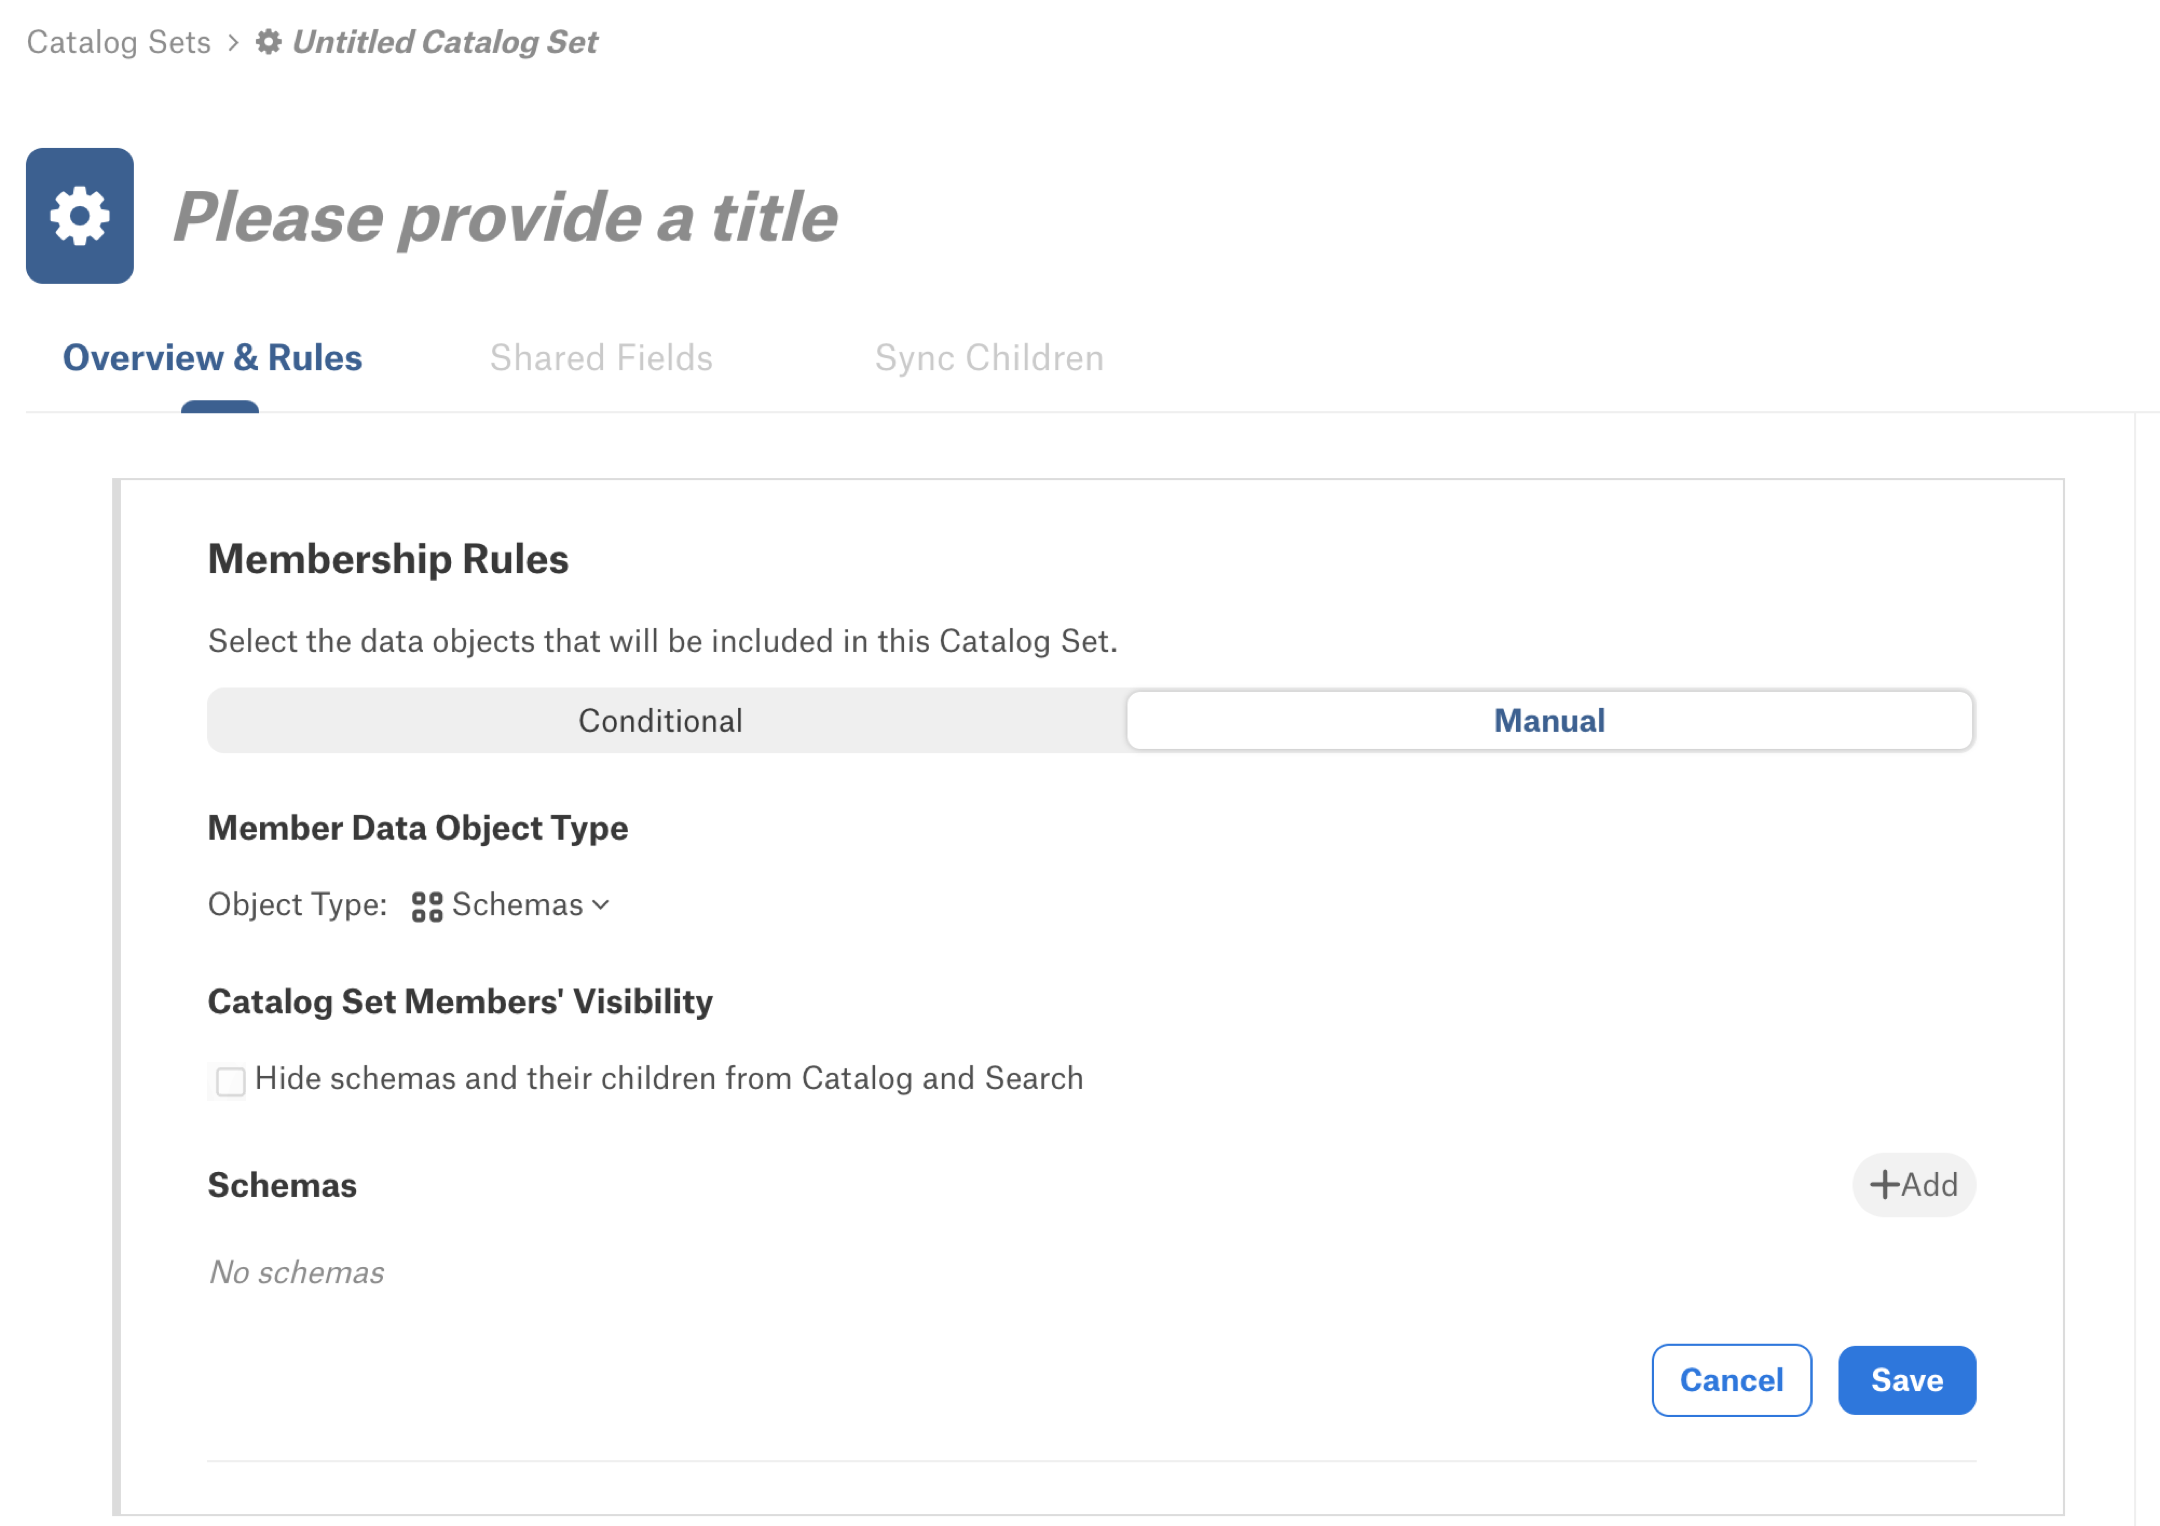
New catalog sets are initially untitled and appear as Untitled Catalog Set [Number]. Click the title to edit it and enter a meaningful name. Click outside the field to apply your changes.
Under Member Data Object Type, select the type of data objects that you want to unite in this set. You can select:
Data Source/Catalog
Schemas
Tables
Columns
If you have selected Data Source/Catalog, be aware that data sources that contain catalogs (like Presto) or databases (like SQL Server) cannot be synchronized with those that don’t. A catalog—but not its data source parent—must be directly added to the catalog set in order to synchronize its children (schemas, tables, columns) with the children of data sources that don’t contain catalogs or databases. In this case, the manual set of members would need to include a combination of data source objects and database catalog objects.
If you have selected Schema, you have the capability to use catalog sets to control the visibility of objects by hiding schemas and their child objects from the catalog. Select the Hide schemas and their children from Catalog and Search checkbox to make the schemas and their child objects undiscoverable by catalog users when they browse and search. Leave this checkbox clear to keep the catalog members visible.
Select the objects you want to include in the set:
Click Add to open the quick search for the selected object type.
Search for and select the specific objects you want to add.
Repeat this process for each additional object you want to include.
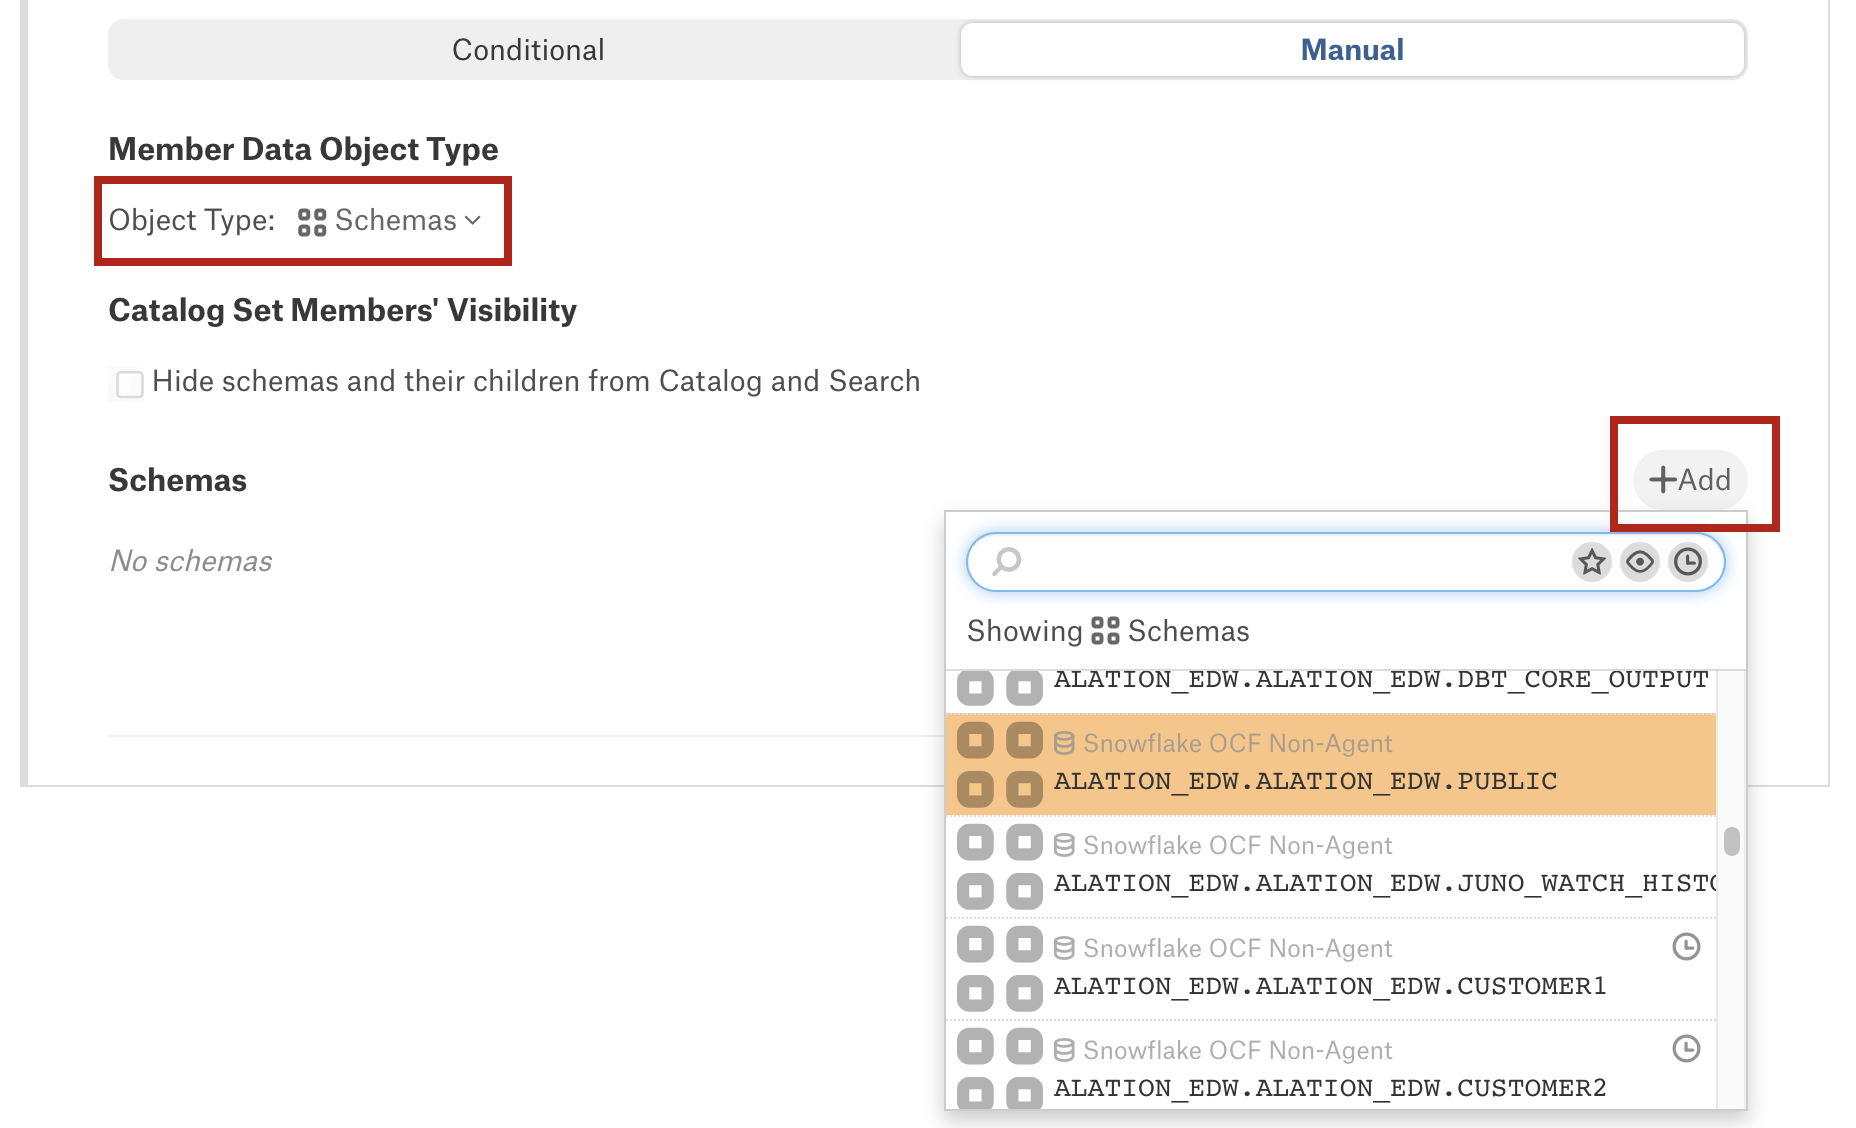
Click Save to create the set. The objects you selected appear under the Catalog Set Members table on the set’s page.
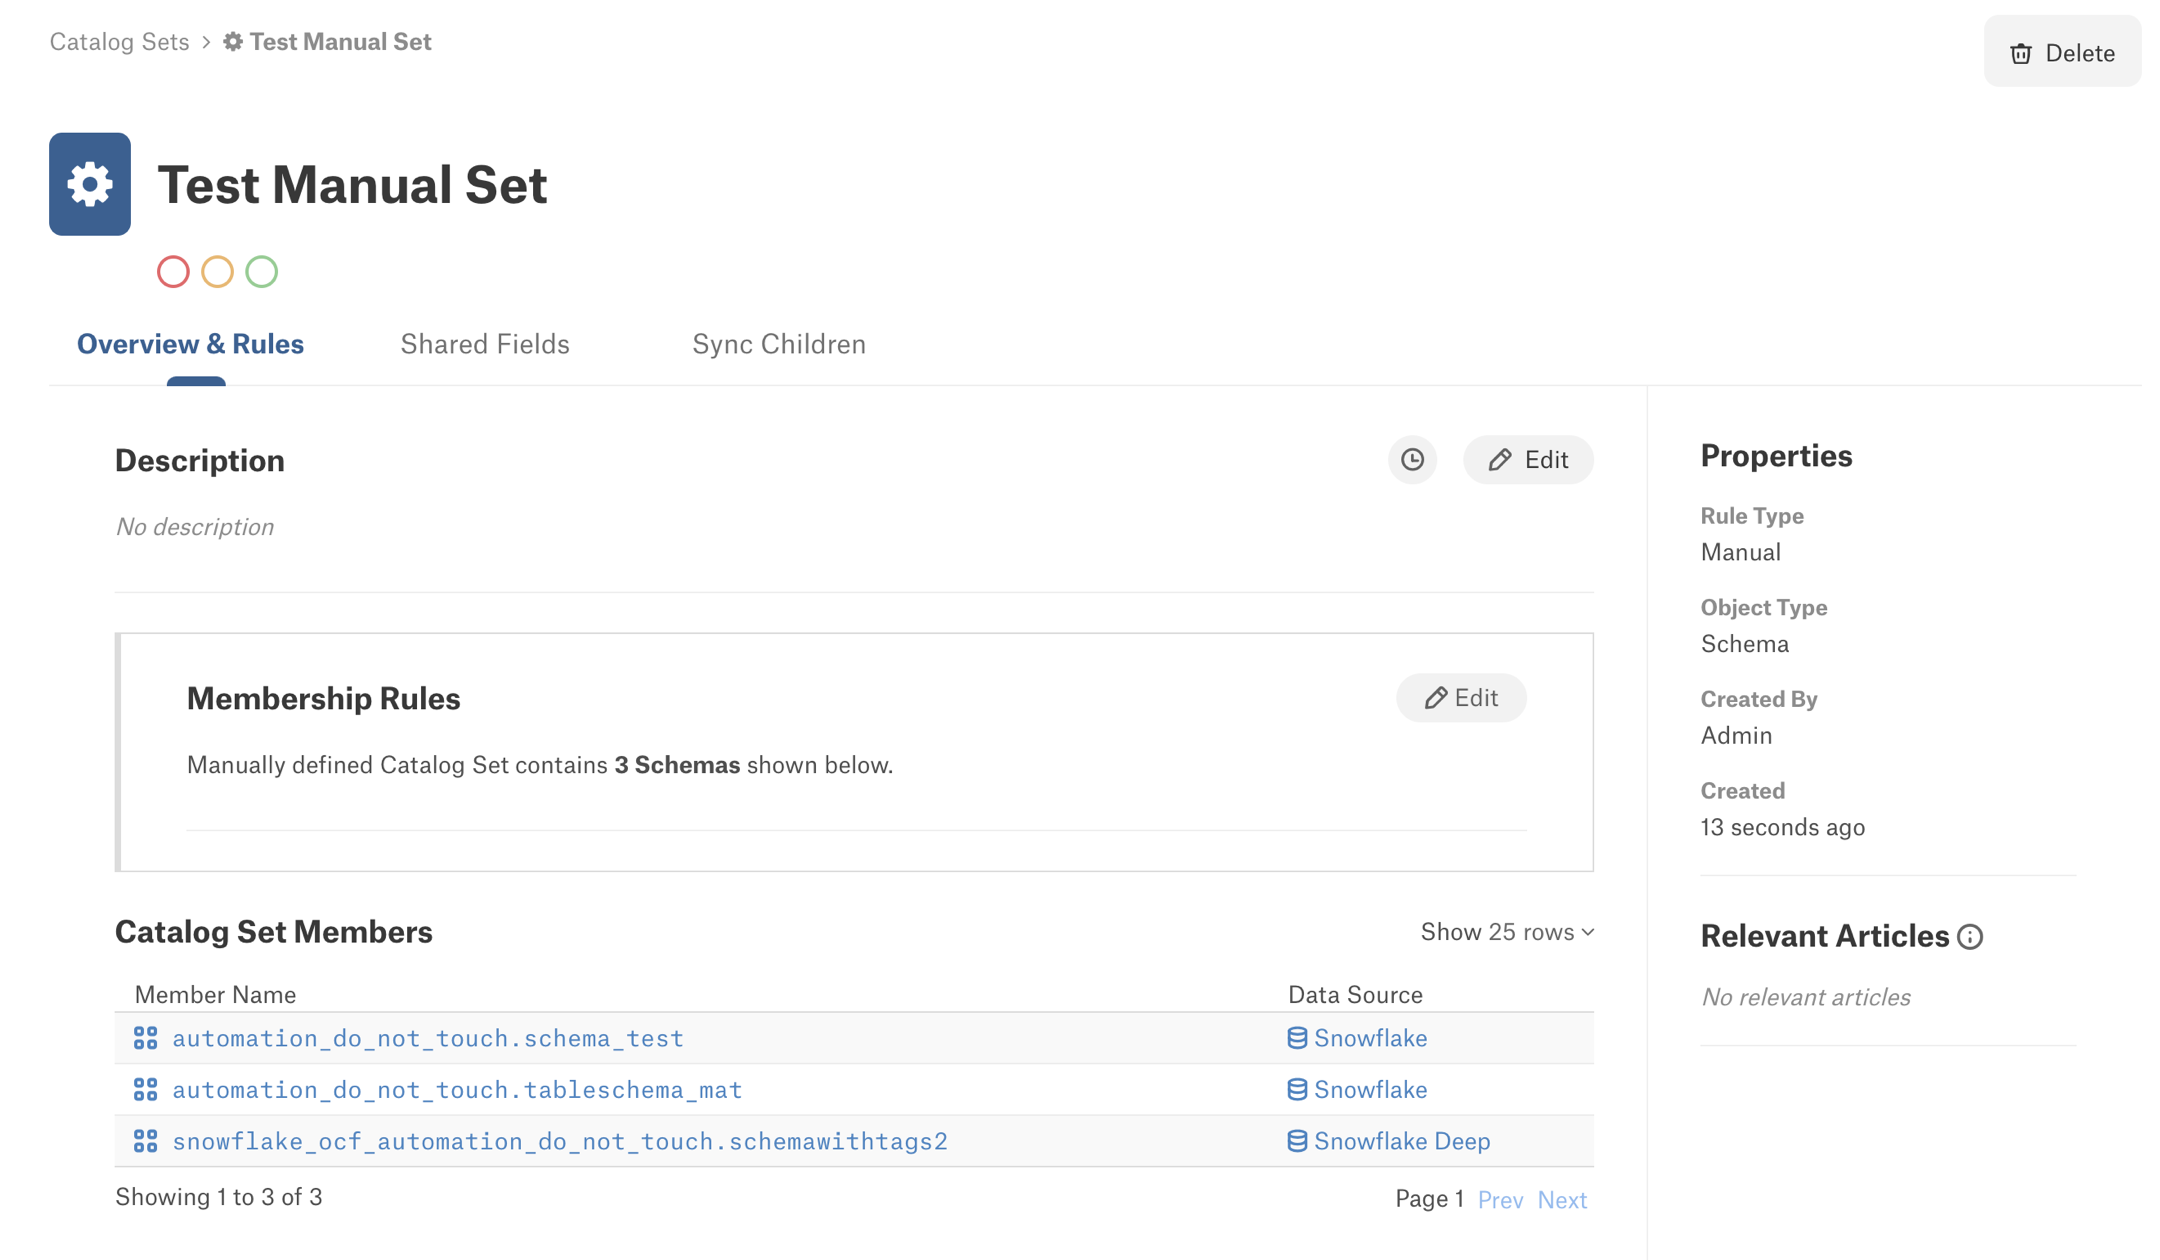
Click the Edit button for the Description field, enter a description, and click Save.
Next, you can use your new set to manage catalog field values on the set members:
Synchronize Metadata Across Child Objects to propagate changes to all equivalent child objects
Bulk-curate Shared Fields shared across the catalog set members
Synchronize Metadata Across Child Objects
The Sync Children tab allows you to synchronize metadata across equivalent child objects of the parent objects in the set. Synchronization means propagating a field value to all objects in a synchronized group of objects. Any edits to the fields made on one child object will be mirrored on all other synchronized objects. The synchronization job will replace existing values in single-value fields with designated “master” values and will append new values to multi-value fields, ensuring that all synchronized objects have a consistent set of values.
You can synchronize child levels successively down to the column level.
Important
The names of child objects should exactly match to be synchronized. For the second and other successive levels, the parent object names should also exactly match. For example, in a manual catalog set for schema objects, the first-level child objects are Tables, and the second-level child objects are Columns. The columns and their parent tables should both have matching names for synchronization to happen on the column level. If this set unites schema A and schema B and both these schemas have a table table C with a column id, then the columns schemaA.tableC.id and schemaB.tableC.id can be synchronized as the names of the columns match and the names of their respective parent tables also match.
To enable metadata synchronization:
Open the Sync Children tab.
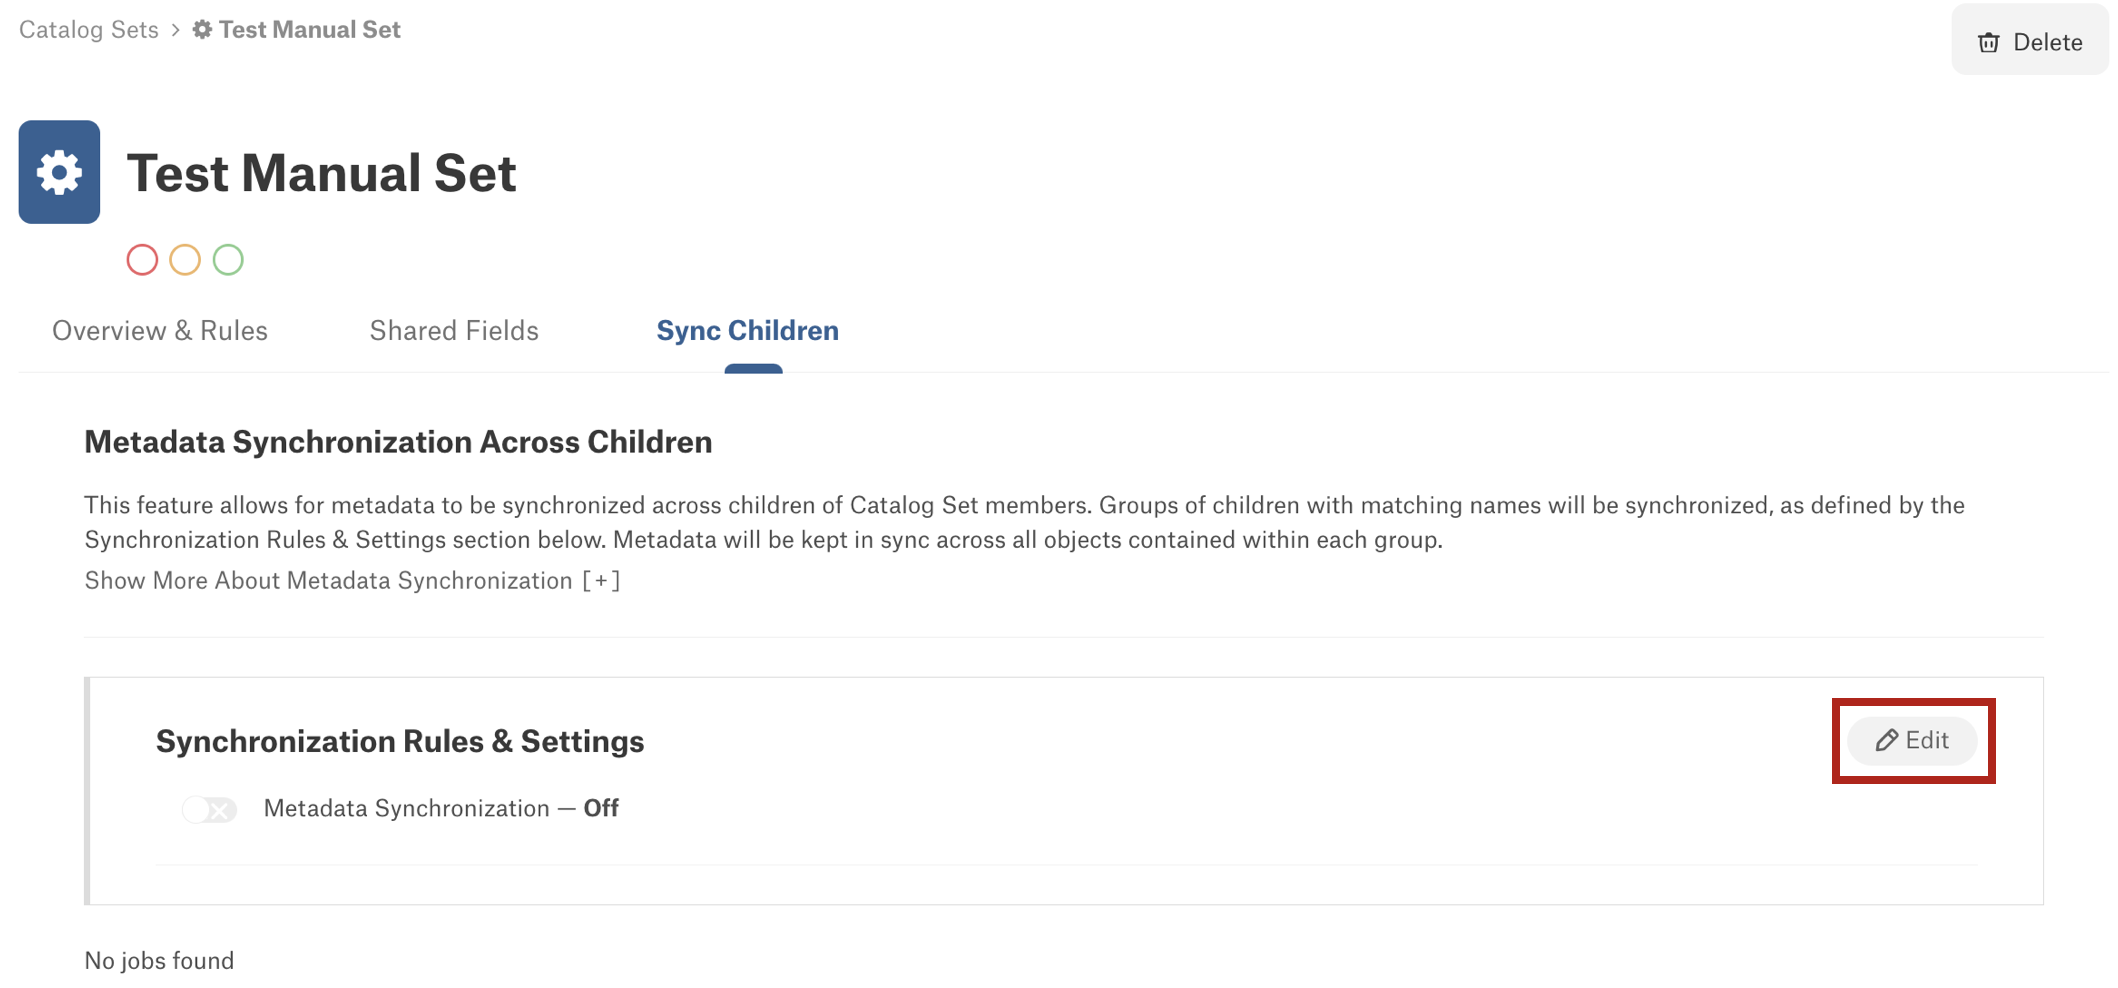
Click Edit next to the Synchronization Rules & Settings.
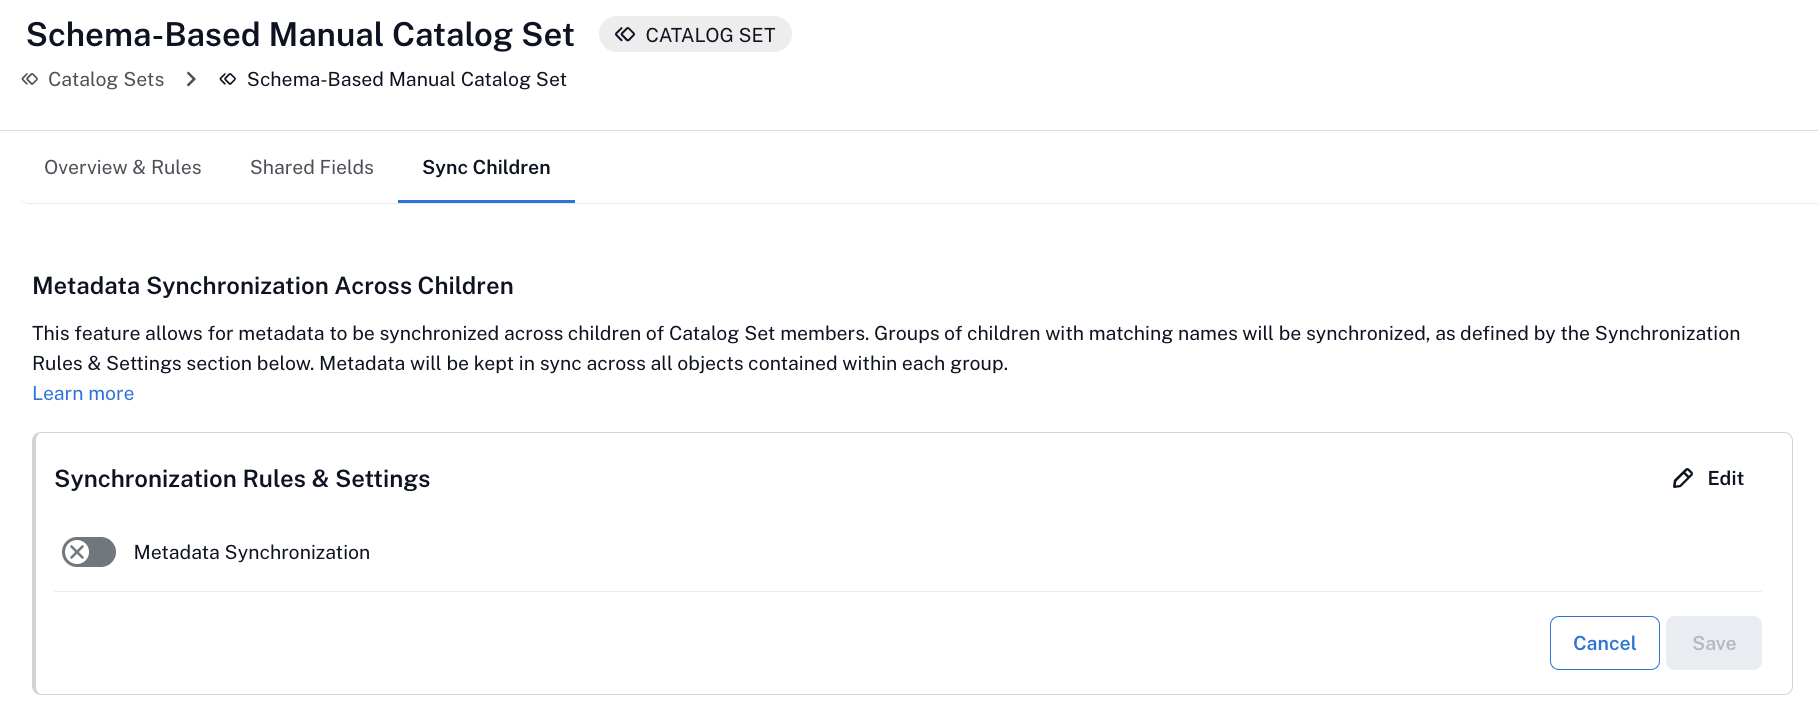
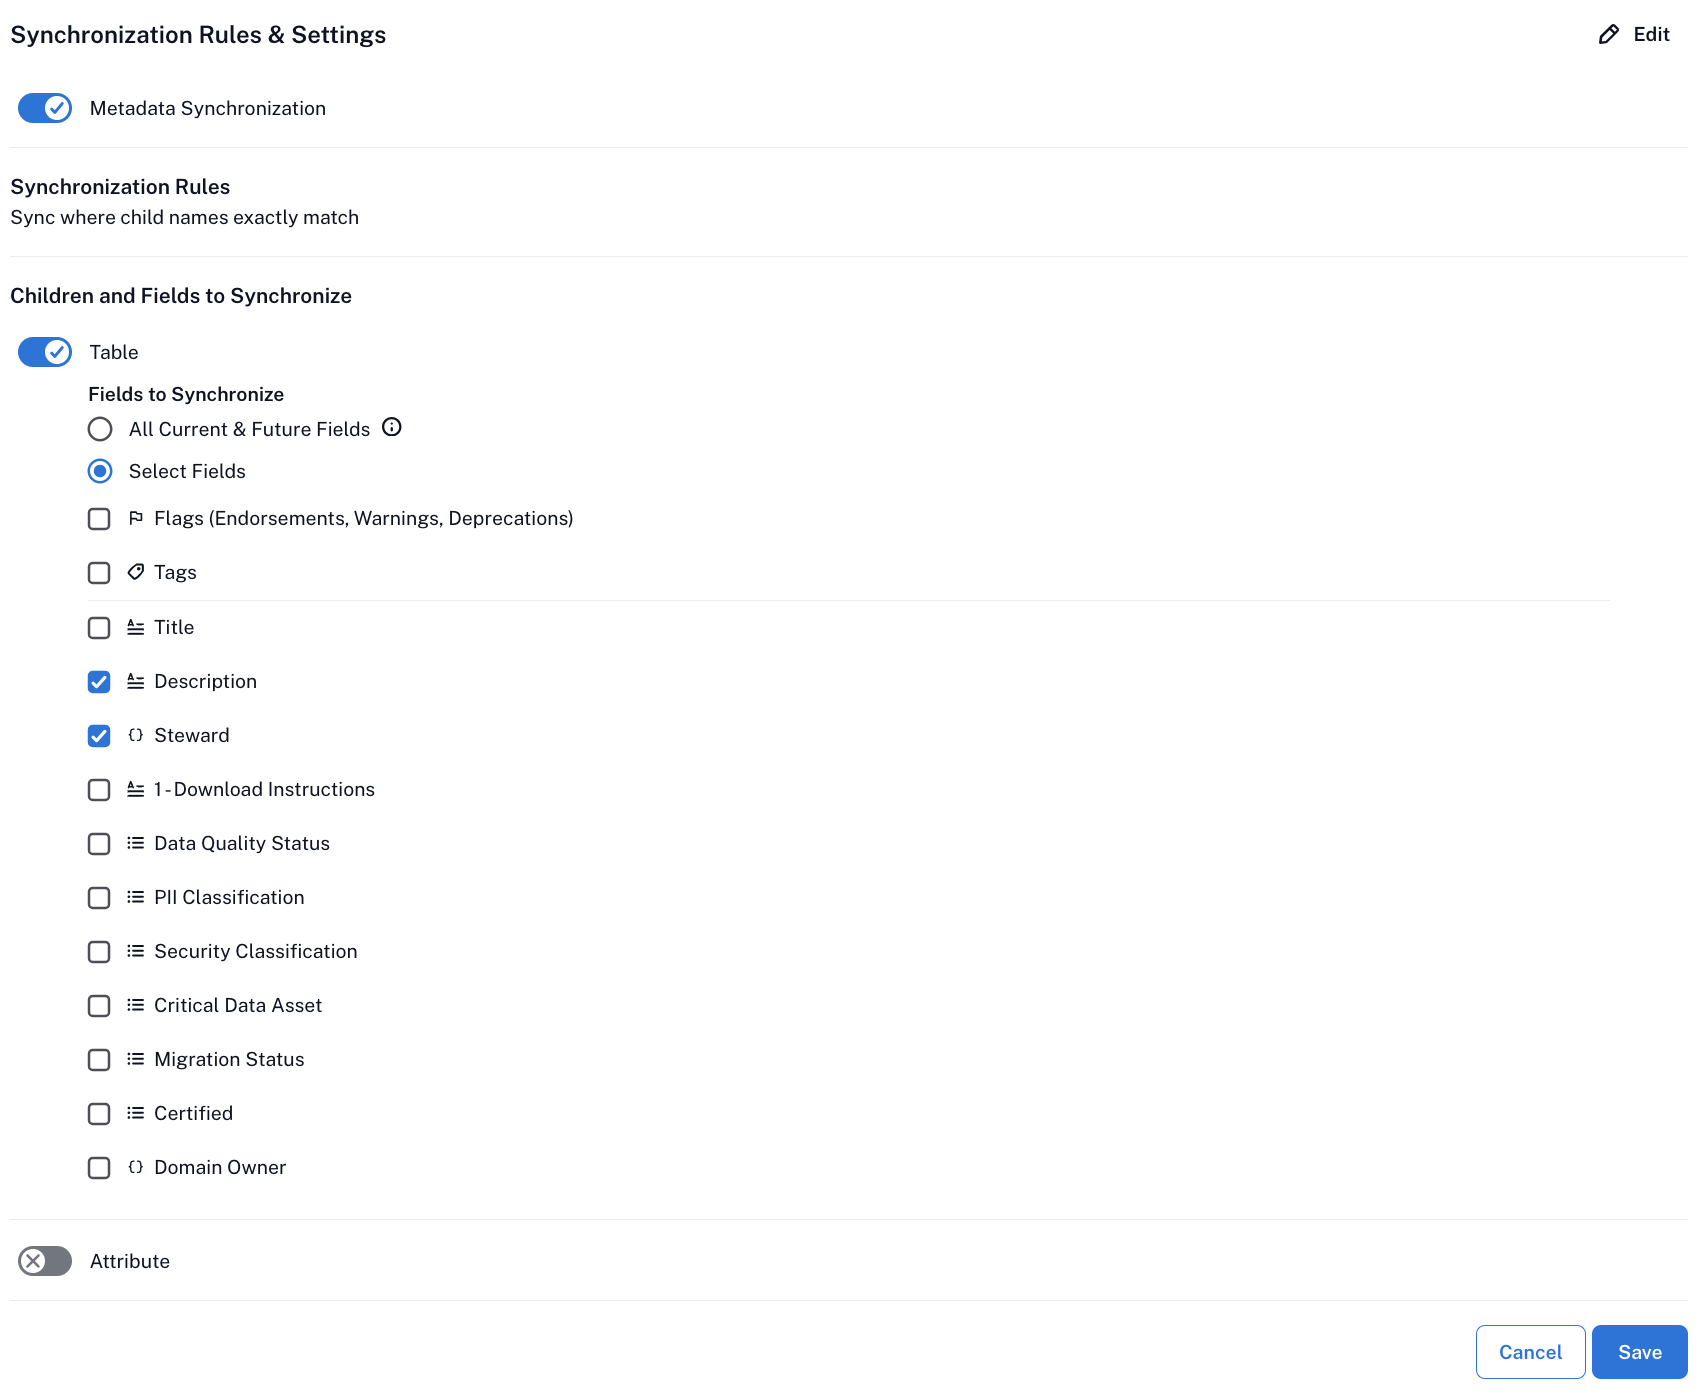
Activate the Metadata Synchronization toggle. This will reveal the child object settings.


Under Children and Fields to Synchronize, enable the child object levels to be synchronized by activating the respective toggles. Each successive level will become editable only after the parent level is enabled. For example, columns cannot be synchronized before synchronization for the table level is enabled.
For each of the child levels you activated, designate the fields to be synchronized. The fields you find listed here are the custom and built-in fields currently added to the object template of the corresponding object type:
Select the All Current & Future Fields option to synchronize all fields, both current and new, that may be added to the template in the future.
Select the Select Fields option to select specific fields and then select the checkboxes of the fields you want synchronized.
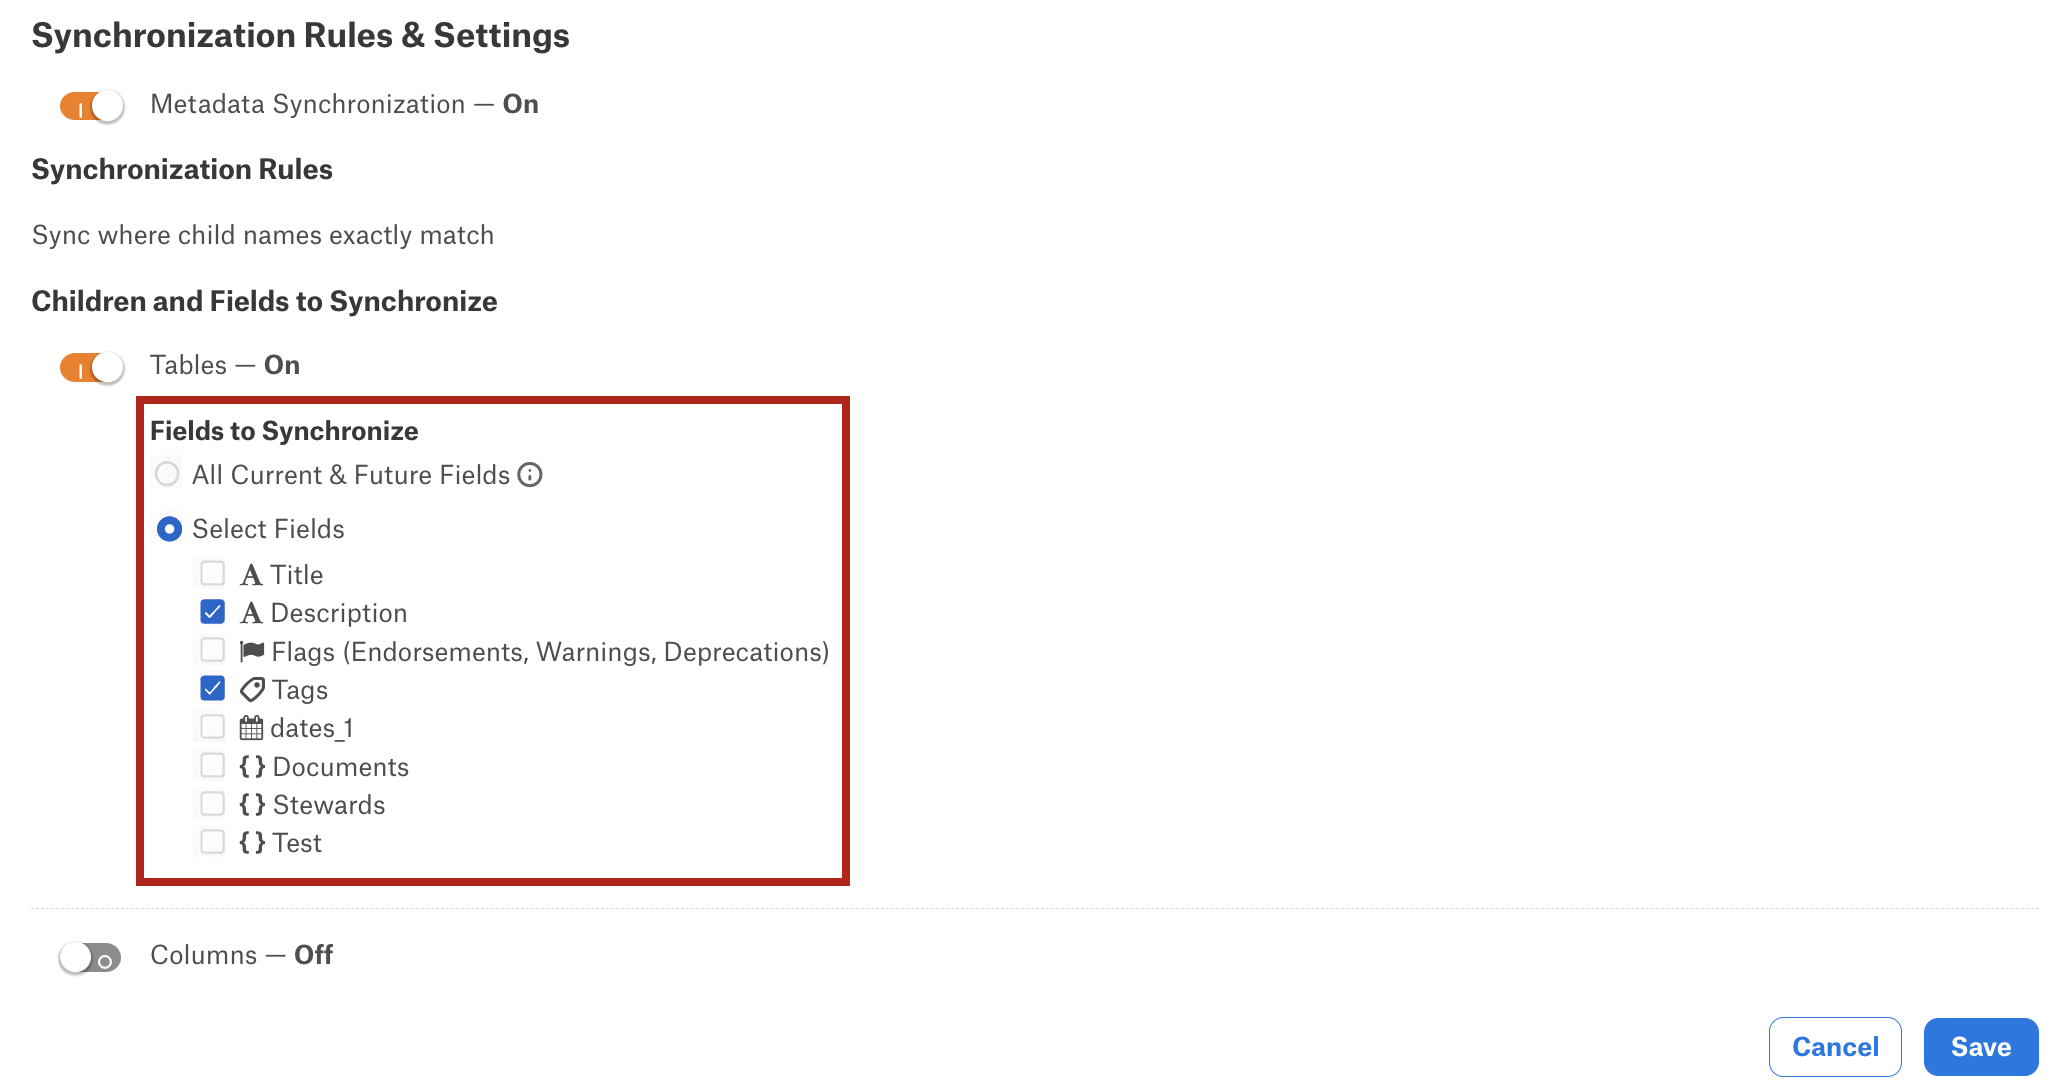
Click Save and in the confirmation dialog that opens, confirm synchronization. This will trigger the initial full synchronization job. Alation will identify child objects with exactly matching names. For these objects, single-value field values will be overwritten by “master” values. Multi-value field values will be combined across all synchronized child objects and display a list of values from all synchronized objects. The history and details of the job are available in the Synchronization Status table under the Sync Children tab. The fields that you have selected for synchronization are displayed under <Data Object Type> Sync Details section under Synchronization Rules and Settings:
Note
“Master” values and logic are used only in the context of full metadata synchronization jobs when child objects of the set members are synchronized from the Sync Children tab. Full synchronization occurs when you a) enable metadata synchronization and b) edit the synchronized child level and/or fields and save your changes.
“Master” values come from the matching child of the “master” catalog set member, which is the first object added to the set. This object appears first in the list of catalog set members in the Catalog Set Members table on the Overview & Rules tab of the set’s catalog page. The values on child objects of the “master” object are used as “master” values when synchronizing metadata on equivalent child objects of other catalog set members. If any field on the child object of the “master” object does not have a value, Alation will apply values from the similar child object on the catalog set member that is second in the list, and so on.
When users update a field value on the catalog page of a synchronized child object whose parent is in a manual catalog set, and if there are equivalent child objects on other set members, the same field will be updated on all equivalent objects. In such a case, the value update gets propagated from the object that is updated to equivalent objects. No synchronization job is triggered and the “master” object logic does not apply.
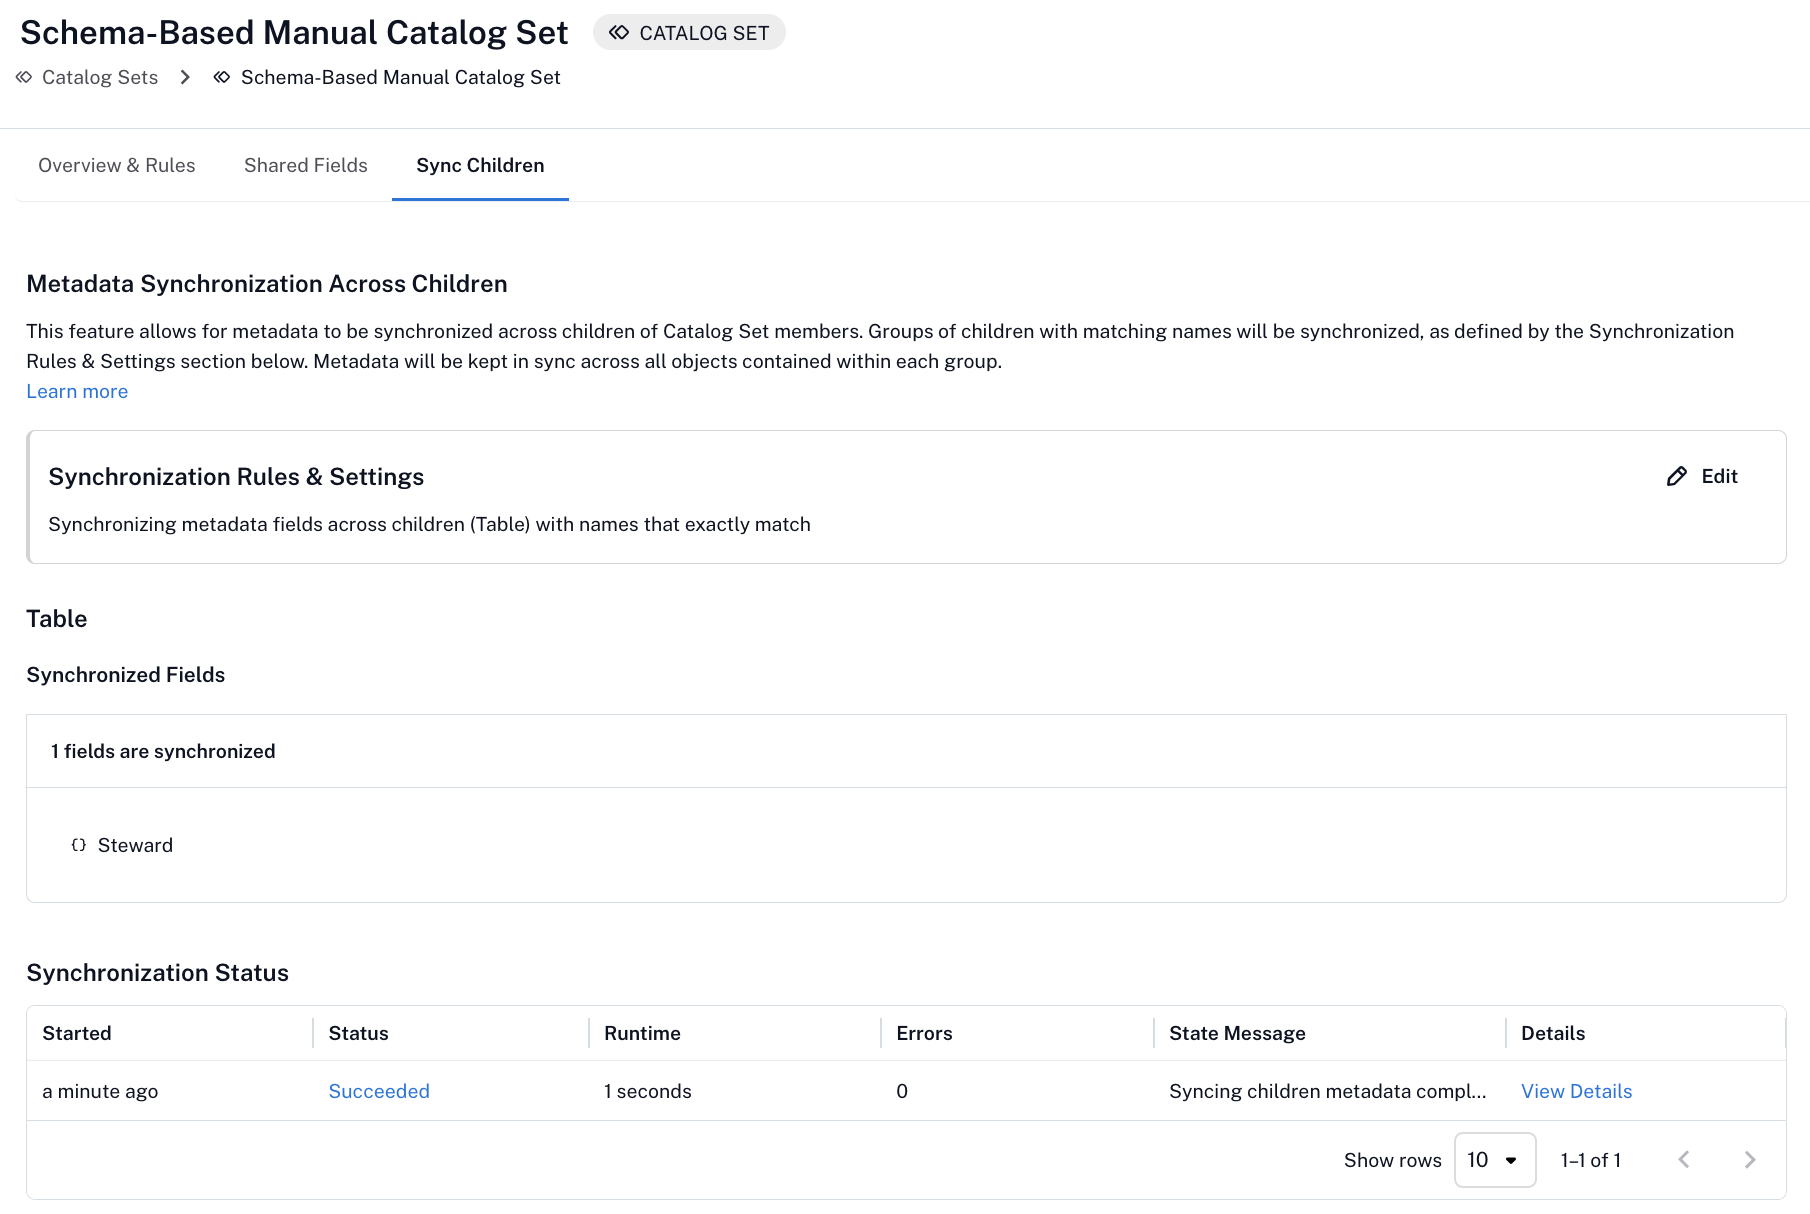
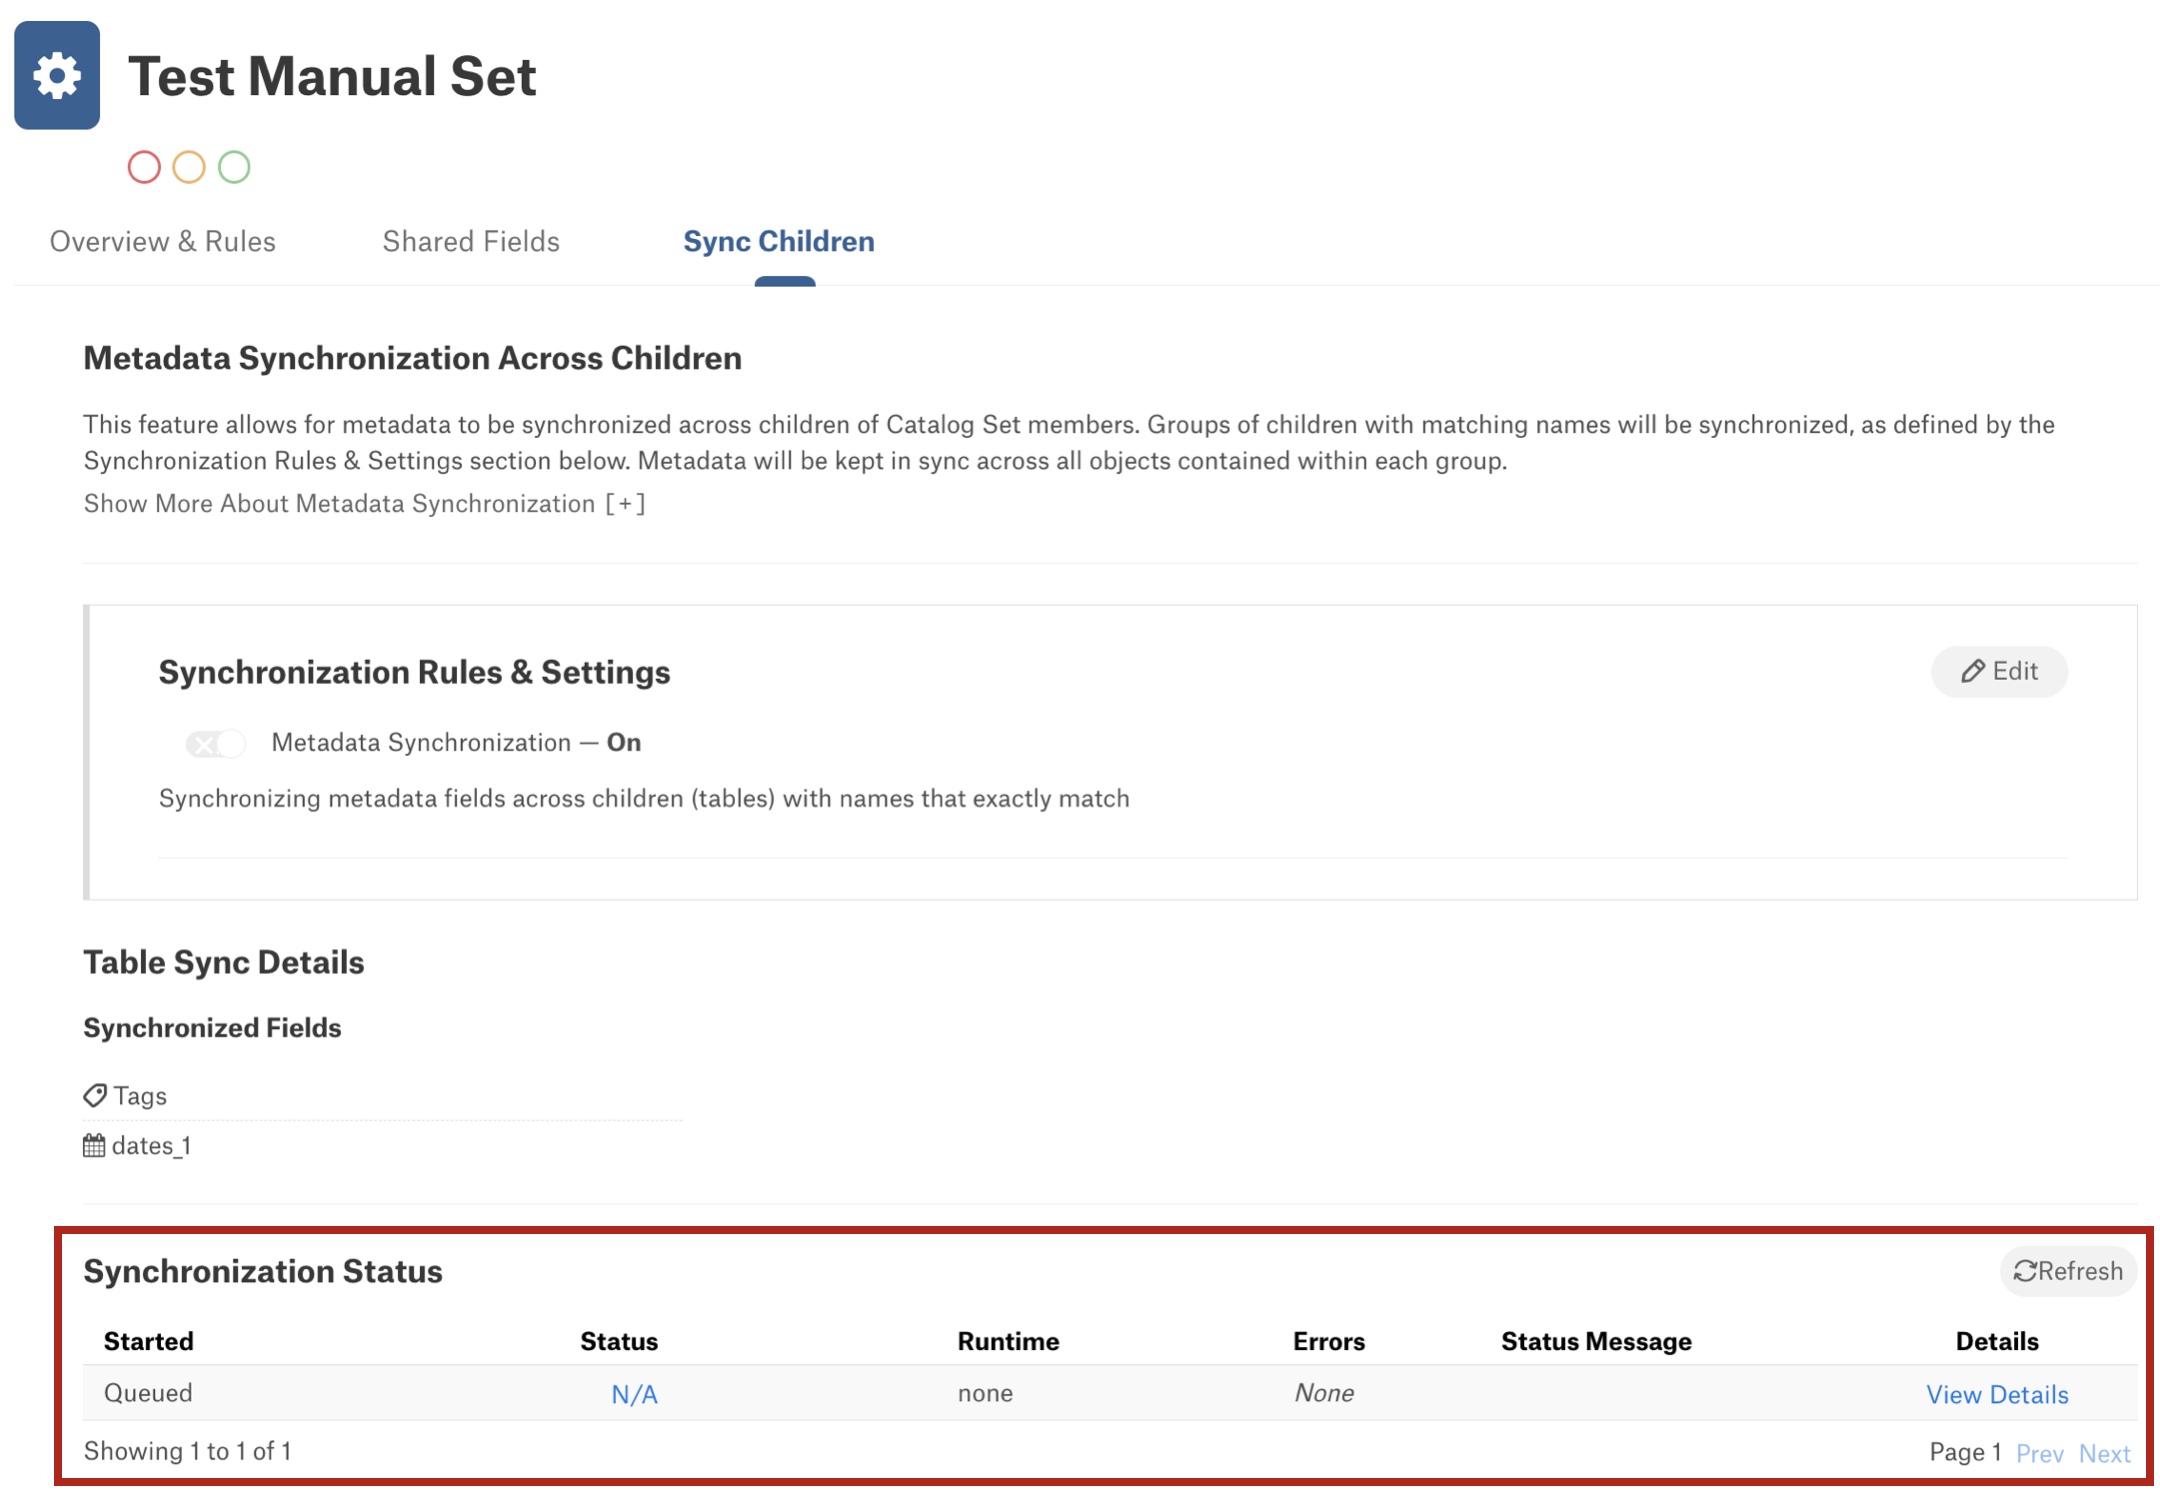
When the synchronization job has completed, equivalent child objects will become synchronized.
Important
Currently in the Alation user interface, there is no indication of synchronized child objects. When you edit a value on a synchronized child, it will be propagated to all other equivalent child objects, but on the catalog page of this object, there is no sign of this value belonging to a synchronized group.
Catalog users may have different access level and do not necessarily have edit permissions for all manual set members and their child objects. A user with appropriate permissions can update fields on the catalog page that this user is allowed to edit:
From version 2024.1.3, with metadata synchronization enabled in the respective manual set, such a change will be propagated to all synchronized child objects sharing the field, even if the user initiating the change doesn’t have edit access to all of the synchronized objects. The field history of all updated objects will contain the details of the actual user who updated the field value.
In versions before 2024.1.3, only users with edit permissions for all synchronized objects and users with the Server Admin role can edit synchronized fields.
Update or Delete Catalog Sets
For details on how to modify or delete a catalog set, refer to Manage Catalog Sets.

